Qumran Archeology

Building a 3d model of Khirbet Qumran.

I am not the first nor will I be the last to attempt a 3d reconstruction of Khirbet Qumran. However,  all that has been made available to this day on the subject is somewhat incomplete and either partly inaccurate, fantasy or subject to strong questioning. Therefore, working with archeologists to reconstruct what the site of Qumran might have looked like was a challenge that I could not pass by.

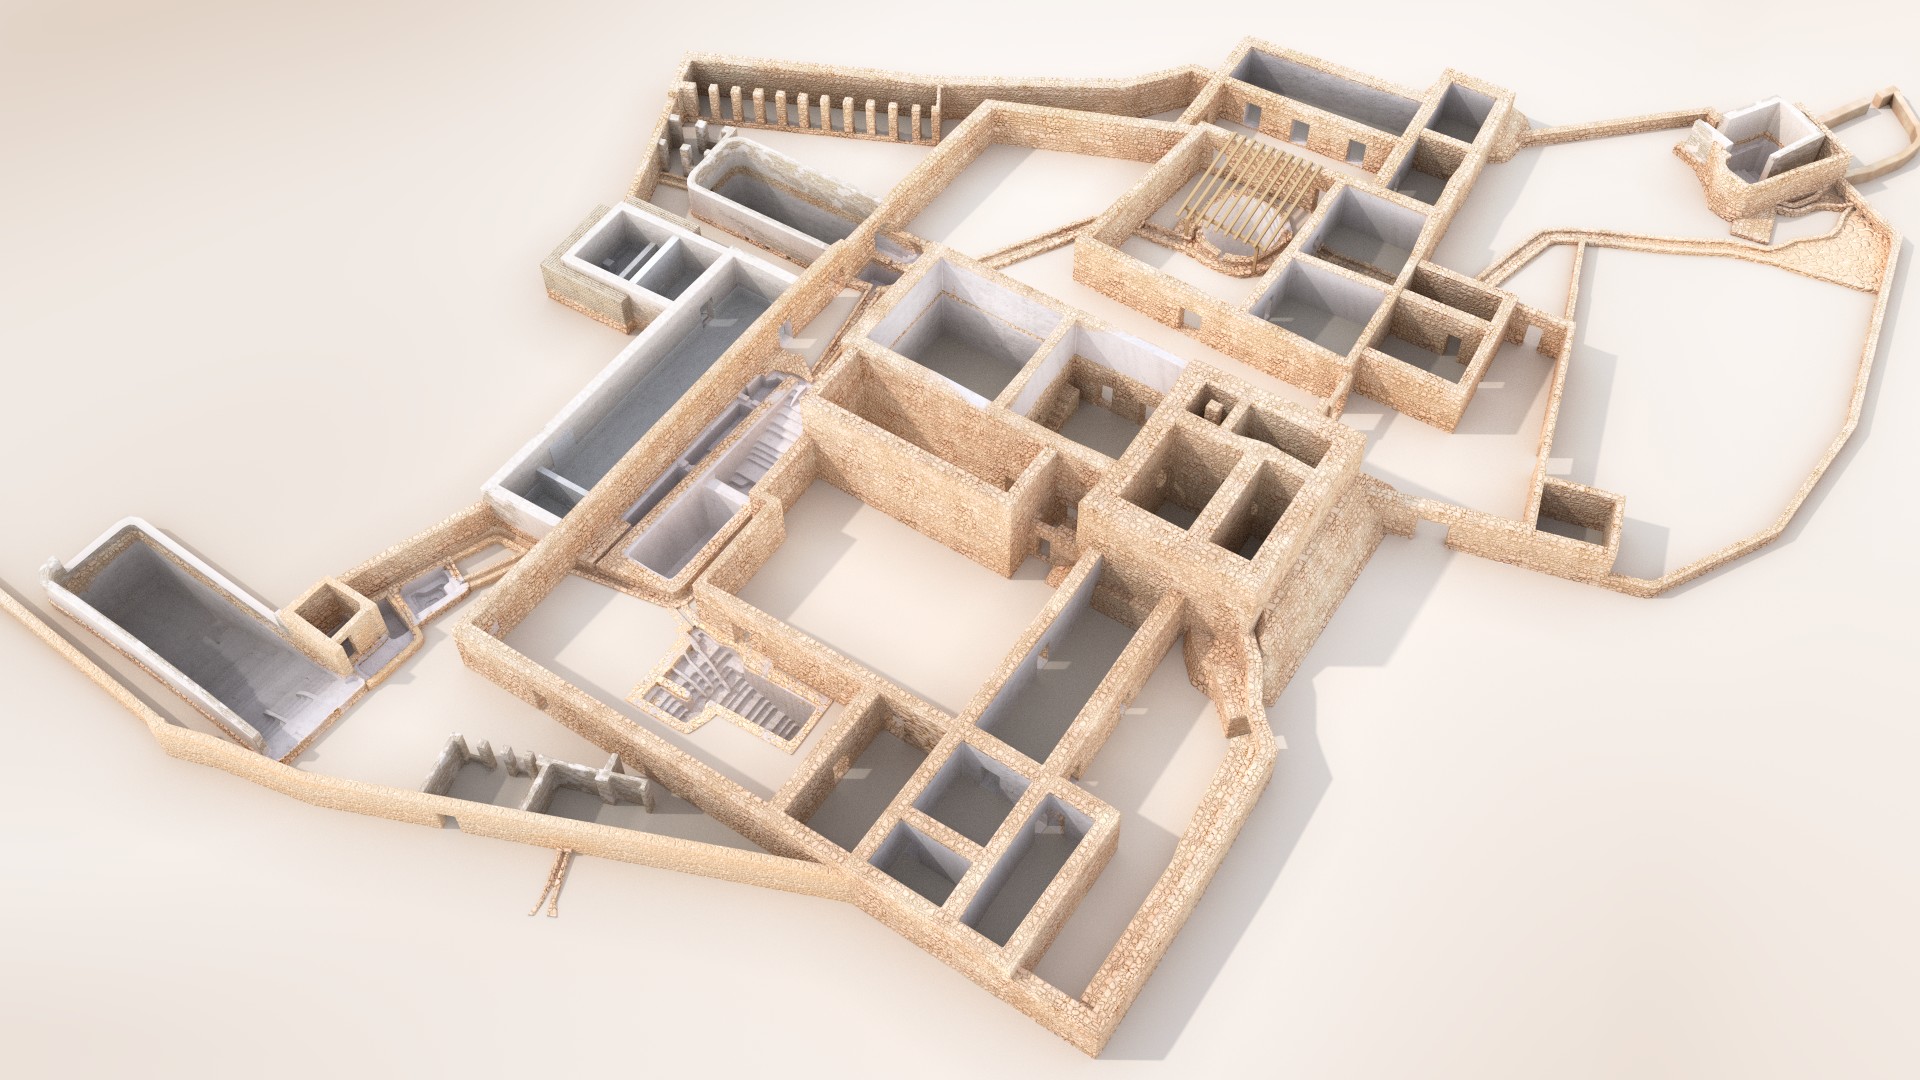
The first thing was to build the main structures of the wall and loci. That was the easy part since it is basically just redrawing the map of the site and extruding to provide elevation. That is where problems arise. First, we don’t know how tall the walls were, nor do we know with certainty how many levels there were in the buildings. Then, an other problem comes along which I believe has largely been either ignored or underestimated: the ground is uneven and there is a slope going from West to Est on the site, which means not all ground-level buildings are at the same elevation. This is evident to any observer on the site, but on the computer or on paper, it is often not shown or discernible. This might seem trivial but it is extremely important to the volume reconstruction of the site as adjacent structures do not necessarily nicely align horizontally as often imagined from looking at the plans. The whole reconstructed aspect of the Khirbet must therefore take this into consideration.

Texturing the model.

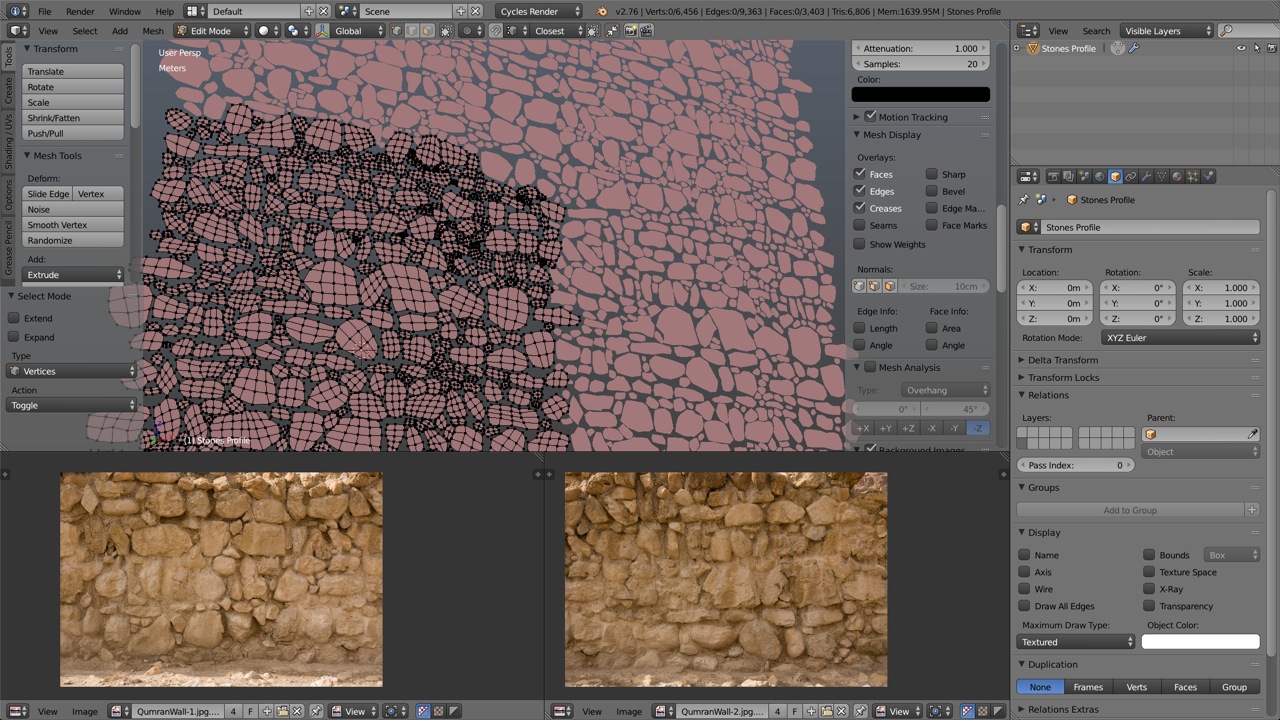
Early on, I was asked to provide some illustrations from the work in progress and was confronted with the difficulty of texturing the model. Relying on generic rock or stone textures definitely was not a nice option. What else? Paint the photos of the real stonewalls themselves on the model? Very hard to do if possible at all given the number of pictures it would require, not mentioning that most walls are now long gone. I choose to try something in the middle: create a generic texture but from the real material. So I went back down there (some 450 metres below sea level, and no I didn’t have to dive) and started shooting some reference pictures.

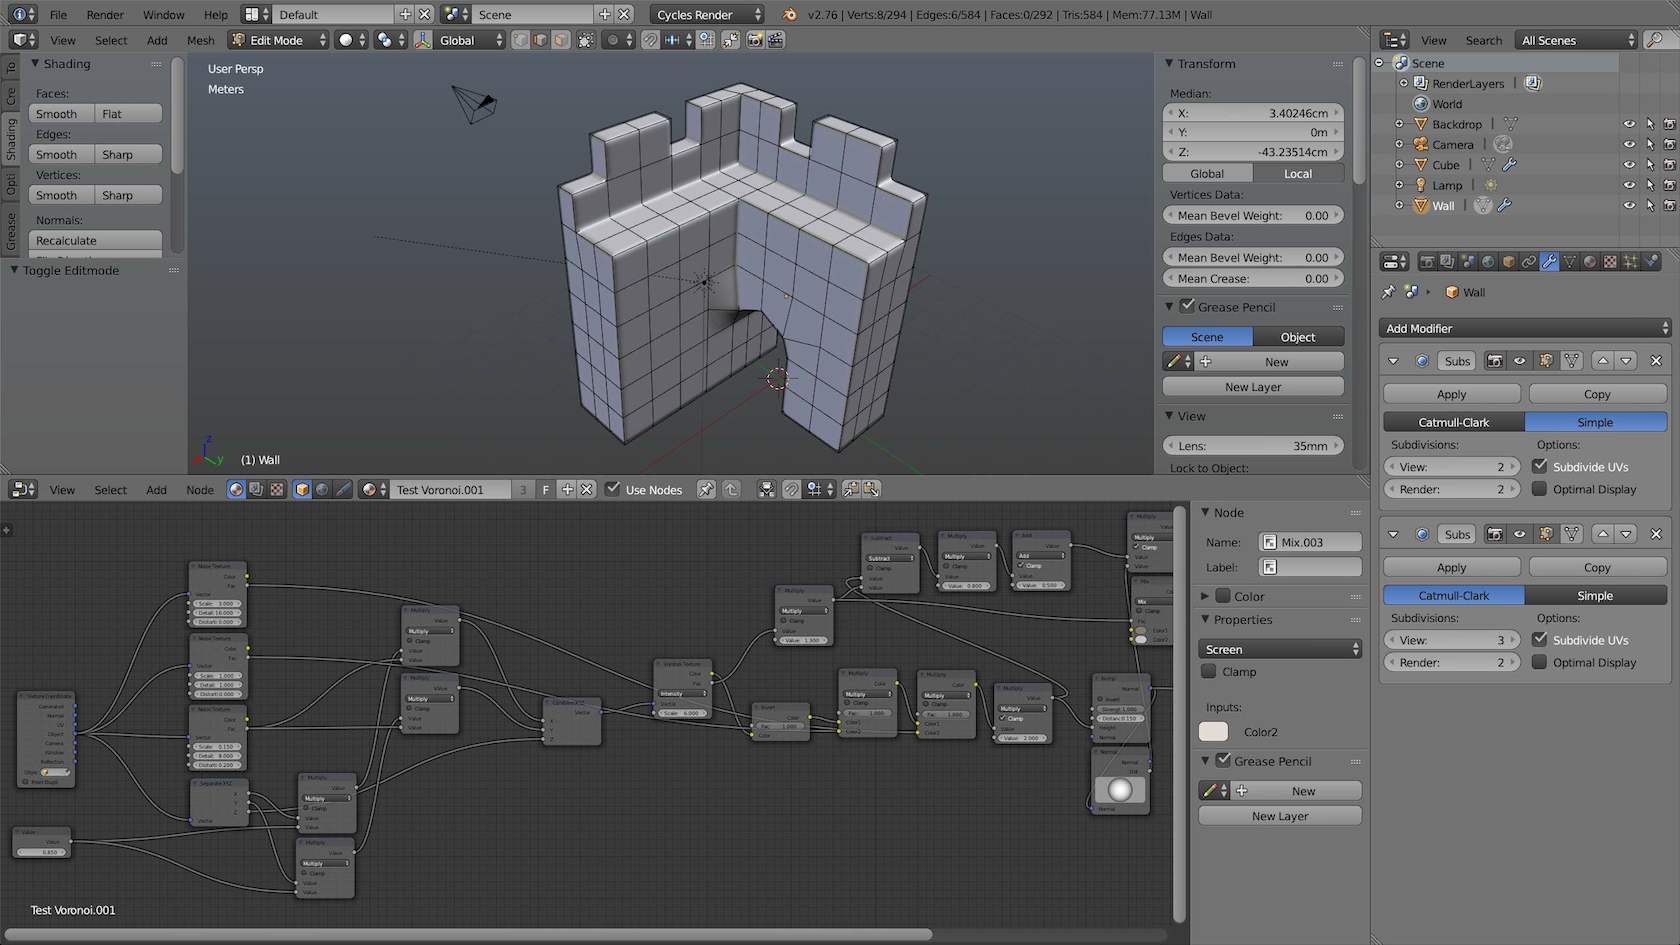
Back at home, using the photos as guide, I started the tedious process of recreating the stonework in Blender to build a 3d model of a portion of the wall.

Screen Shot 1

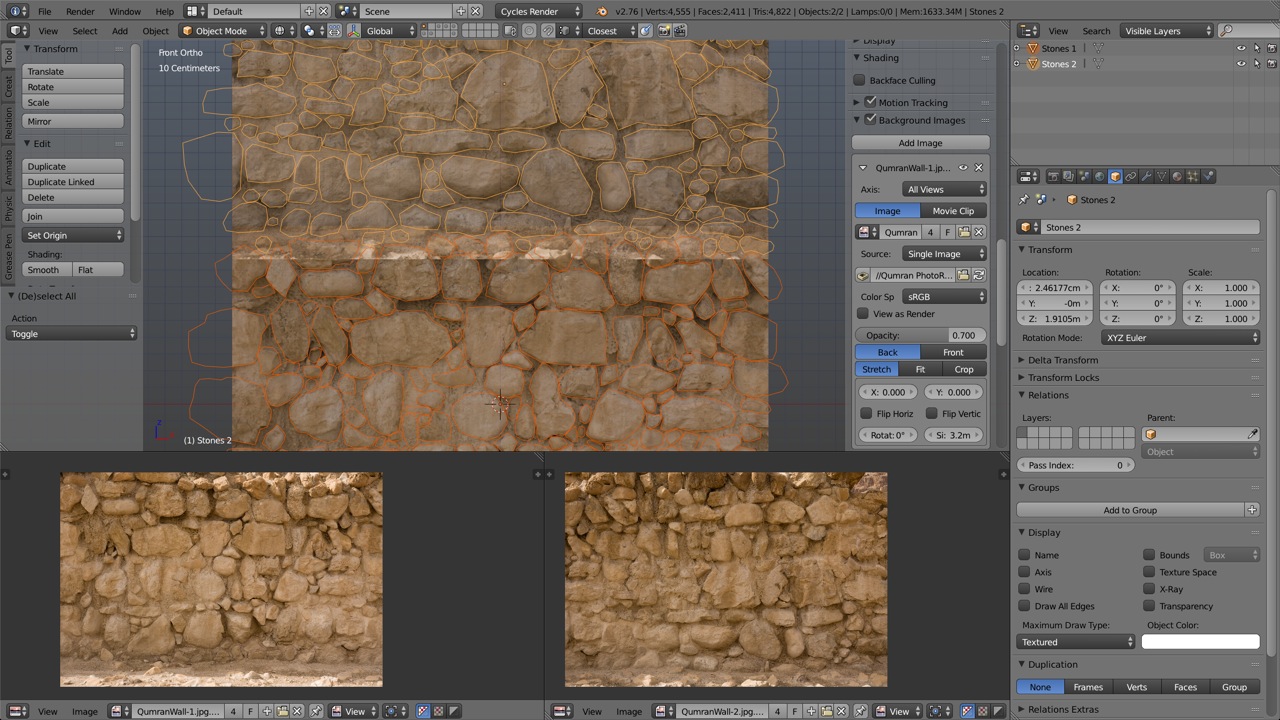
Once the stone themselves where built, I removed the seams and a duplication of the whole area made the process of checking the tiling of the pattern easier.

Screen Shot 2

Then, extruding, subdividing and sculpting took place. Very lengthily process as I had to sculpt every stone individually but in the end the result is quite acceptable I think. It could still be improved, but as a first shot, that’ll do for now.

Screen Shot 3

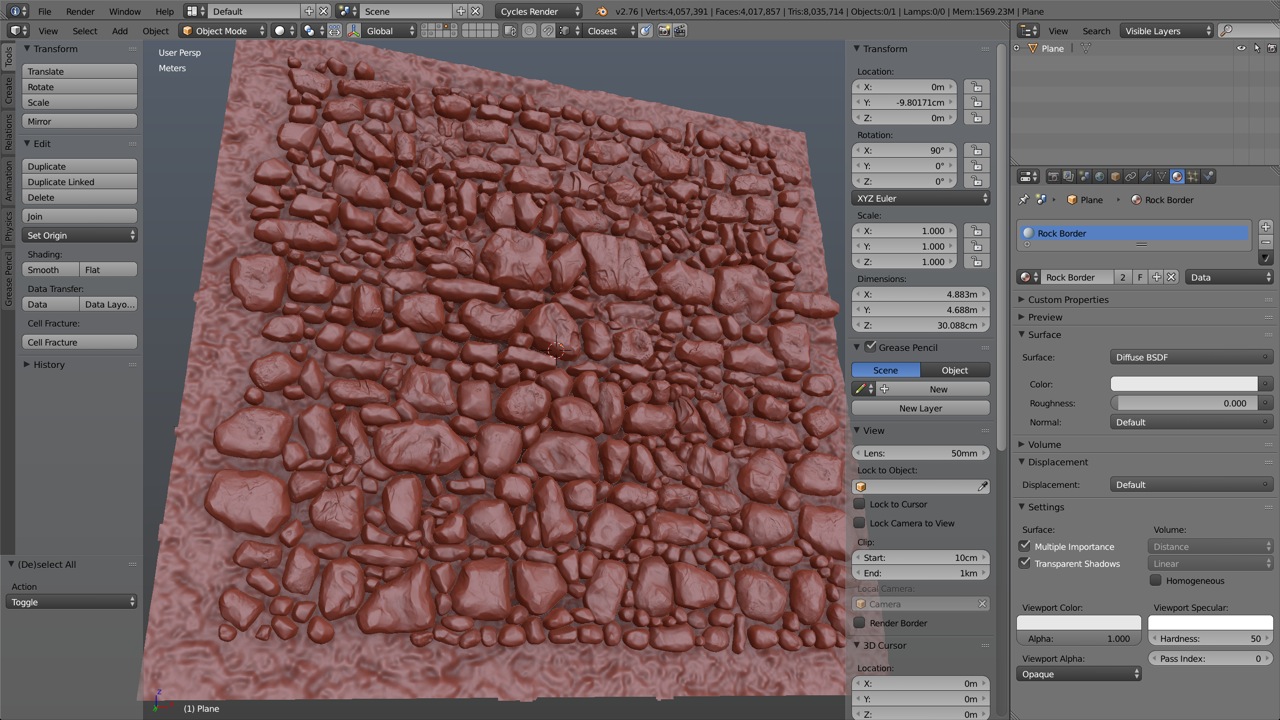
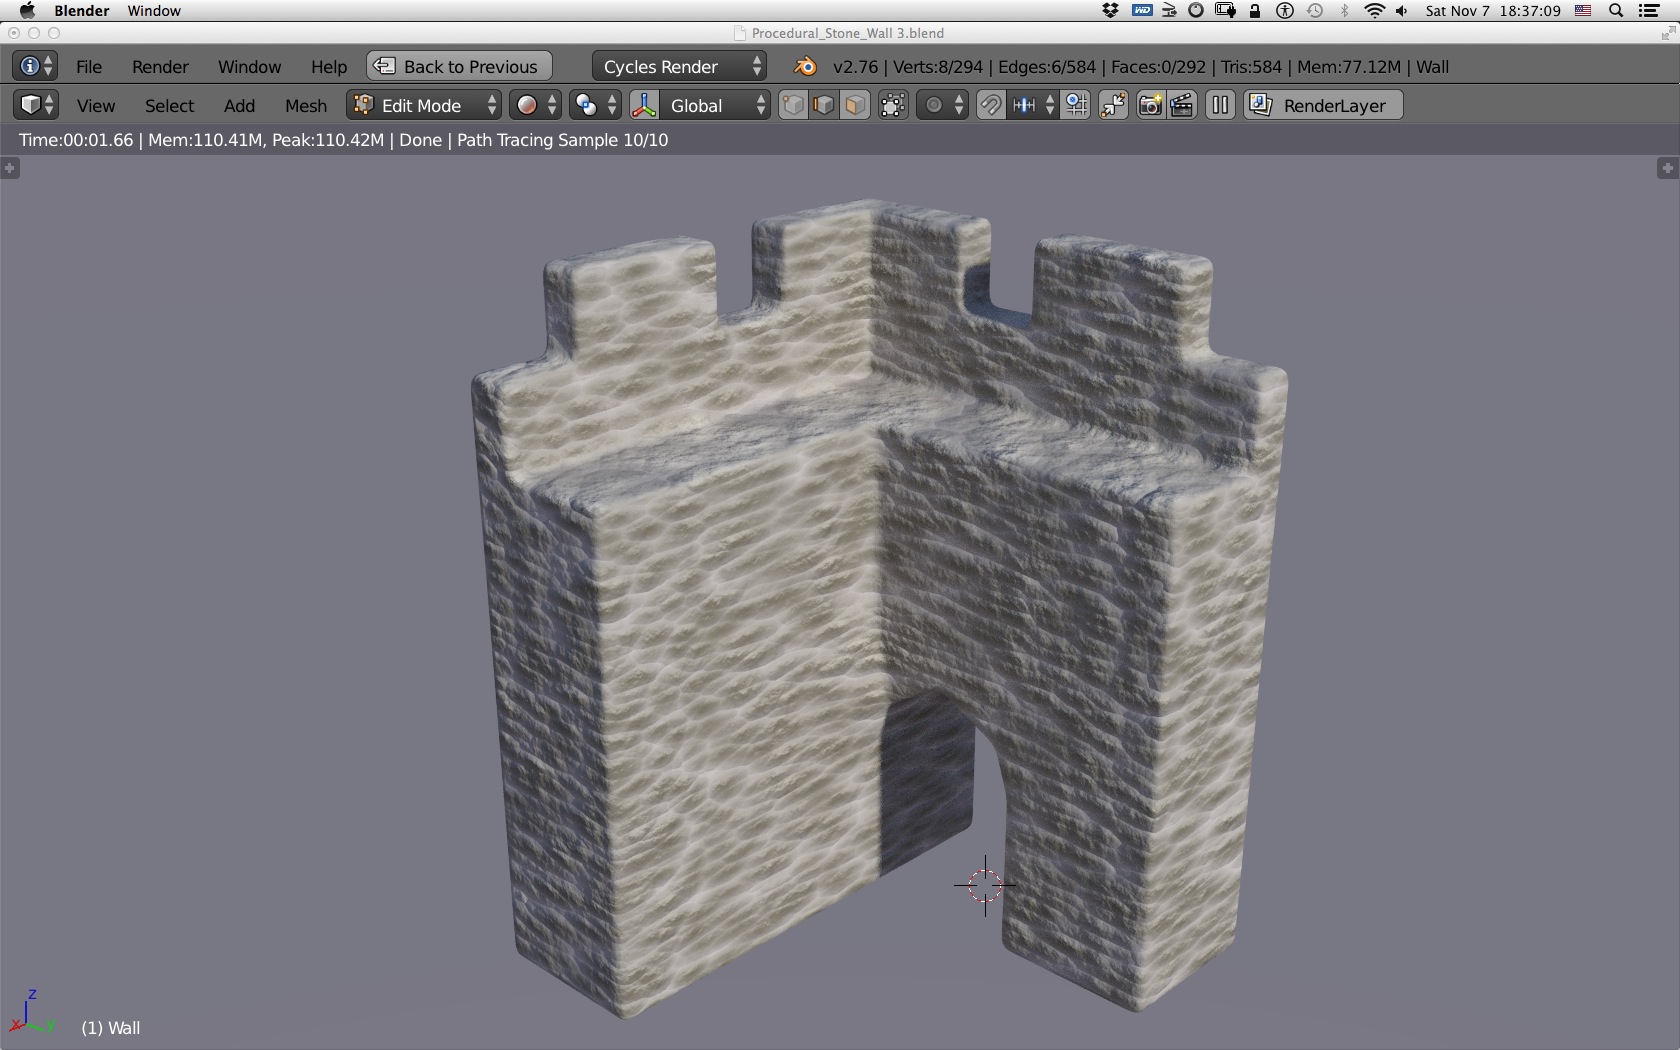
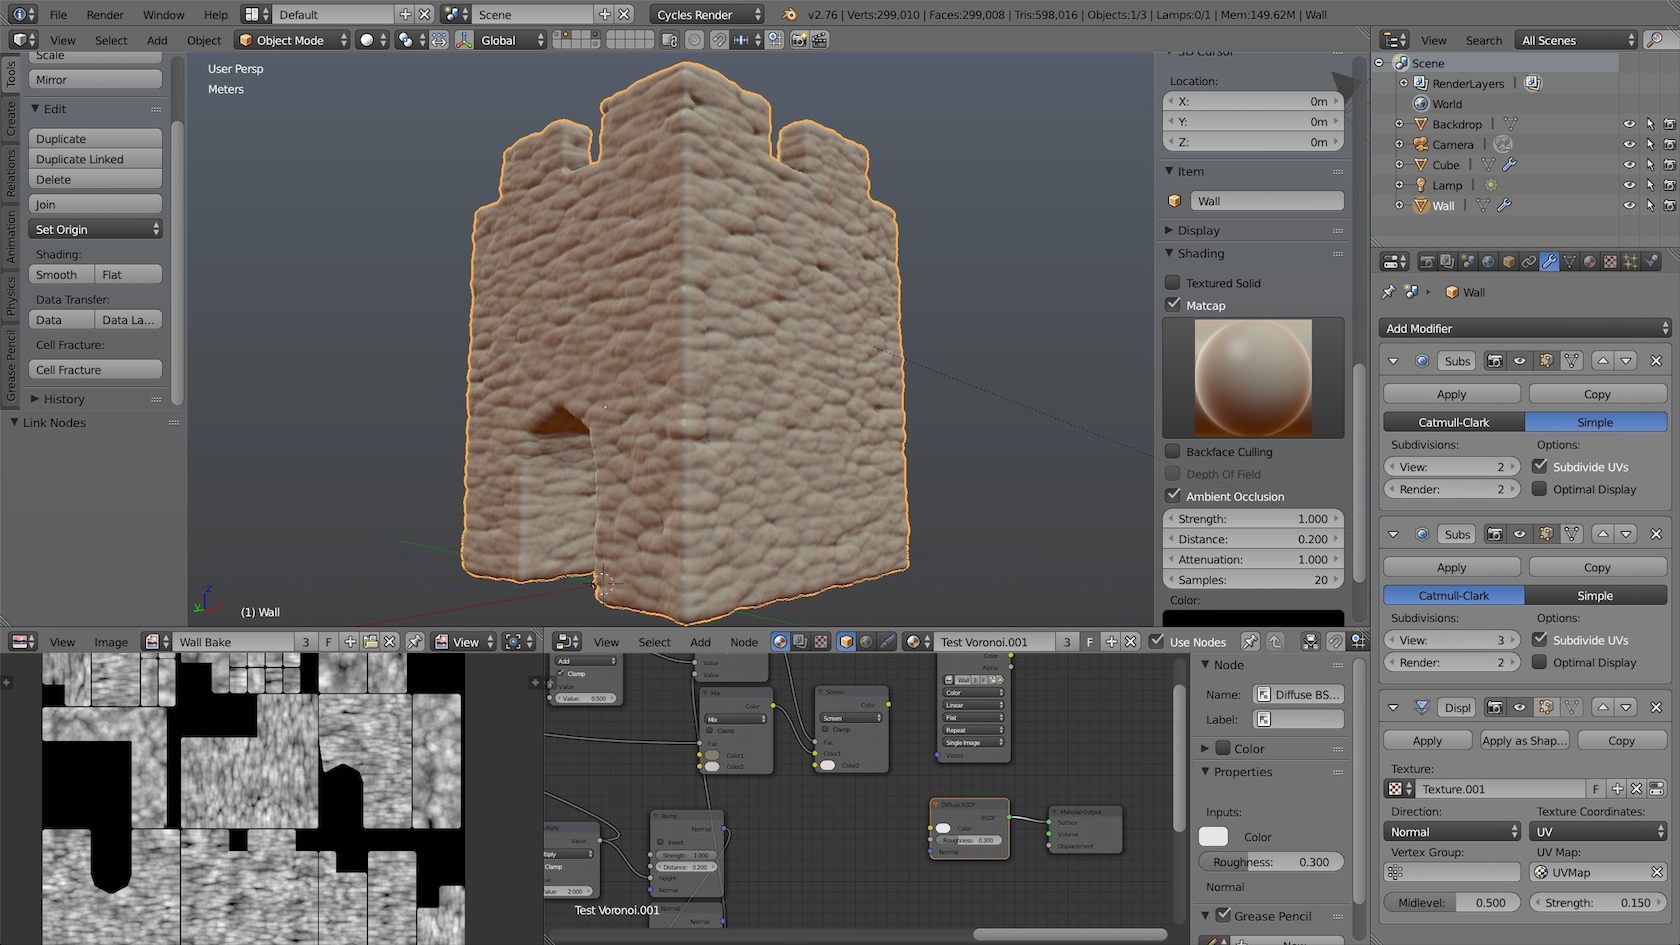
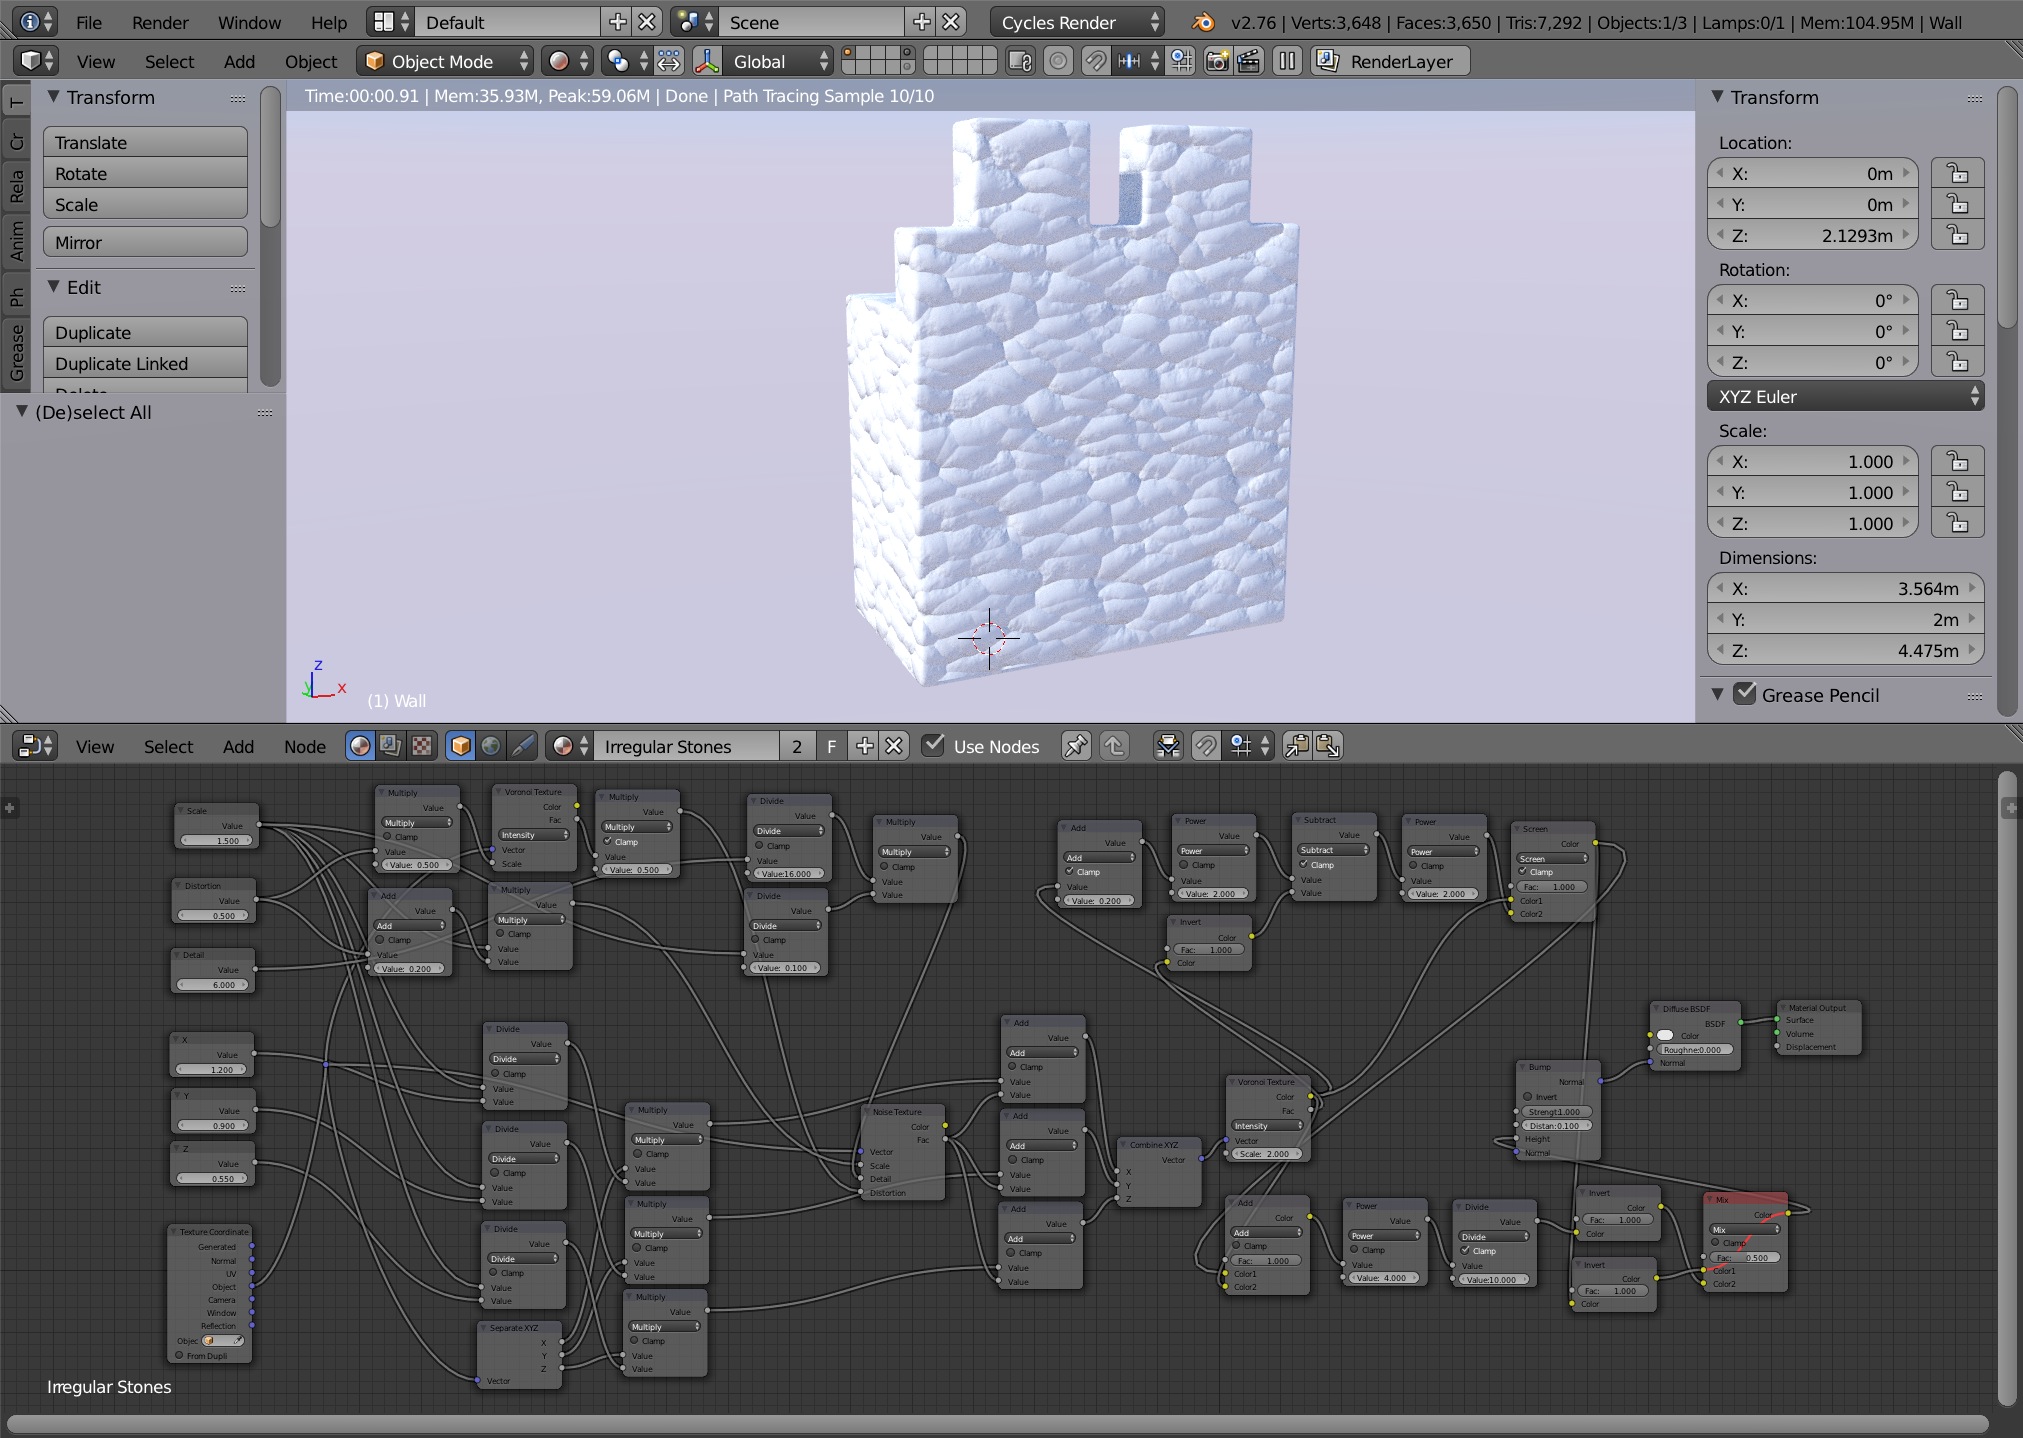
After this, it is just a matter of baking the normals, height map and ambient occlusion to give me a good starting point for building a tillable Qumran wall texture.

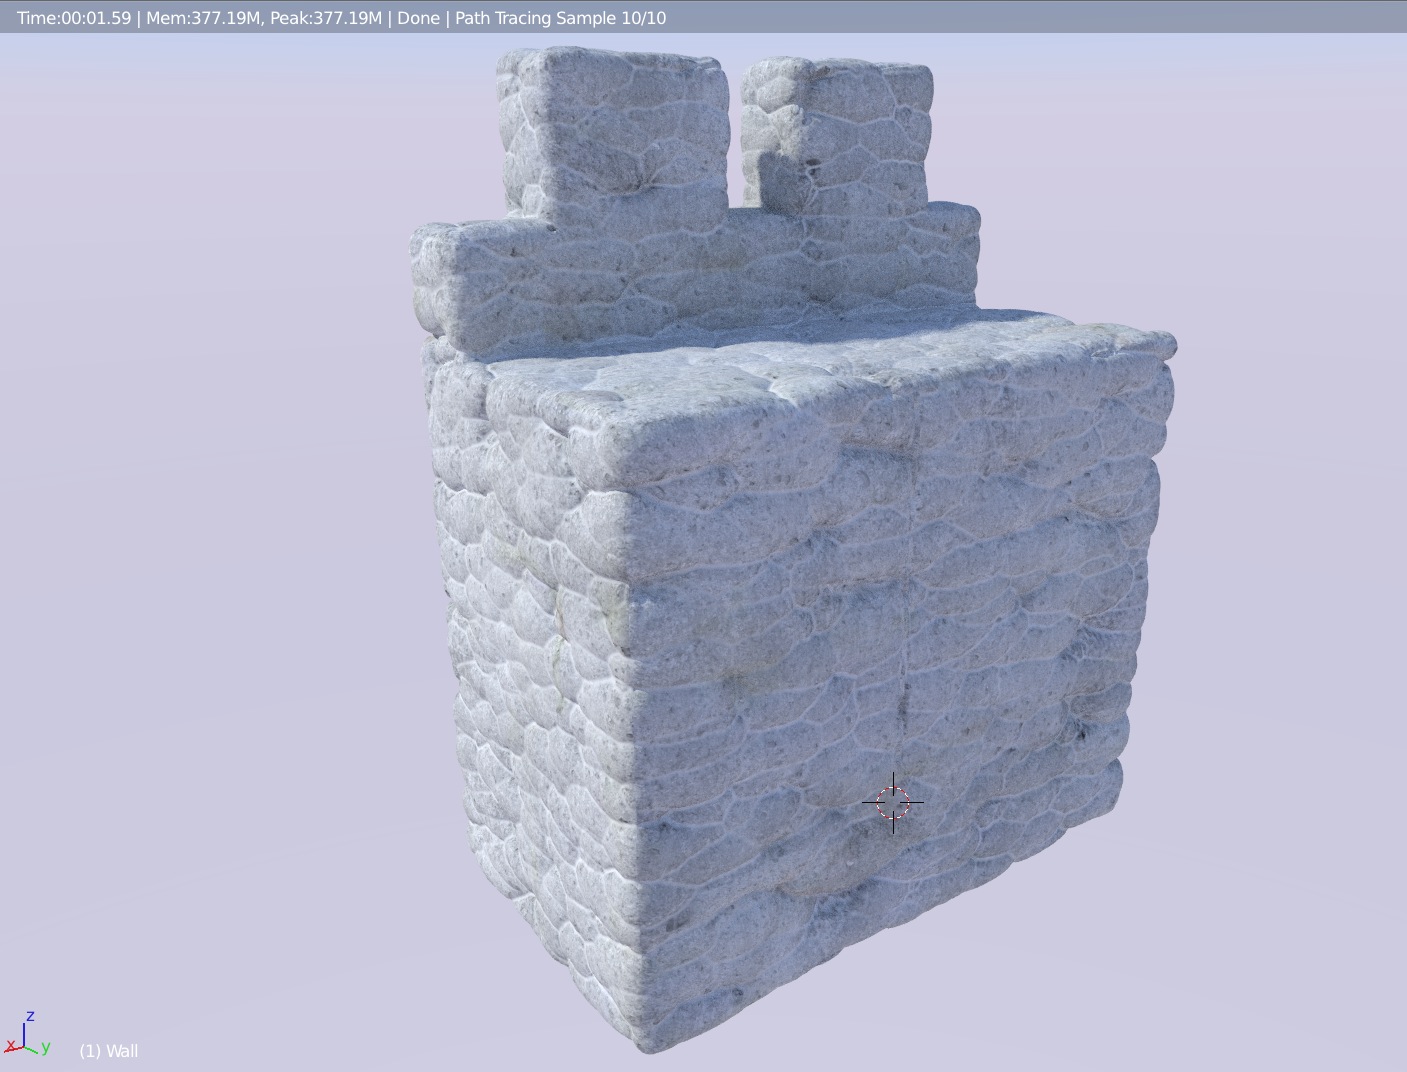
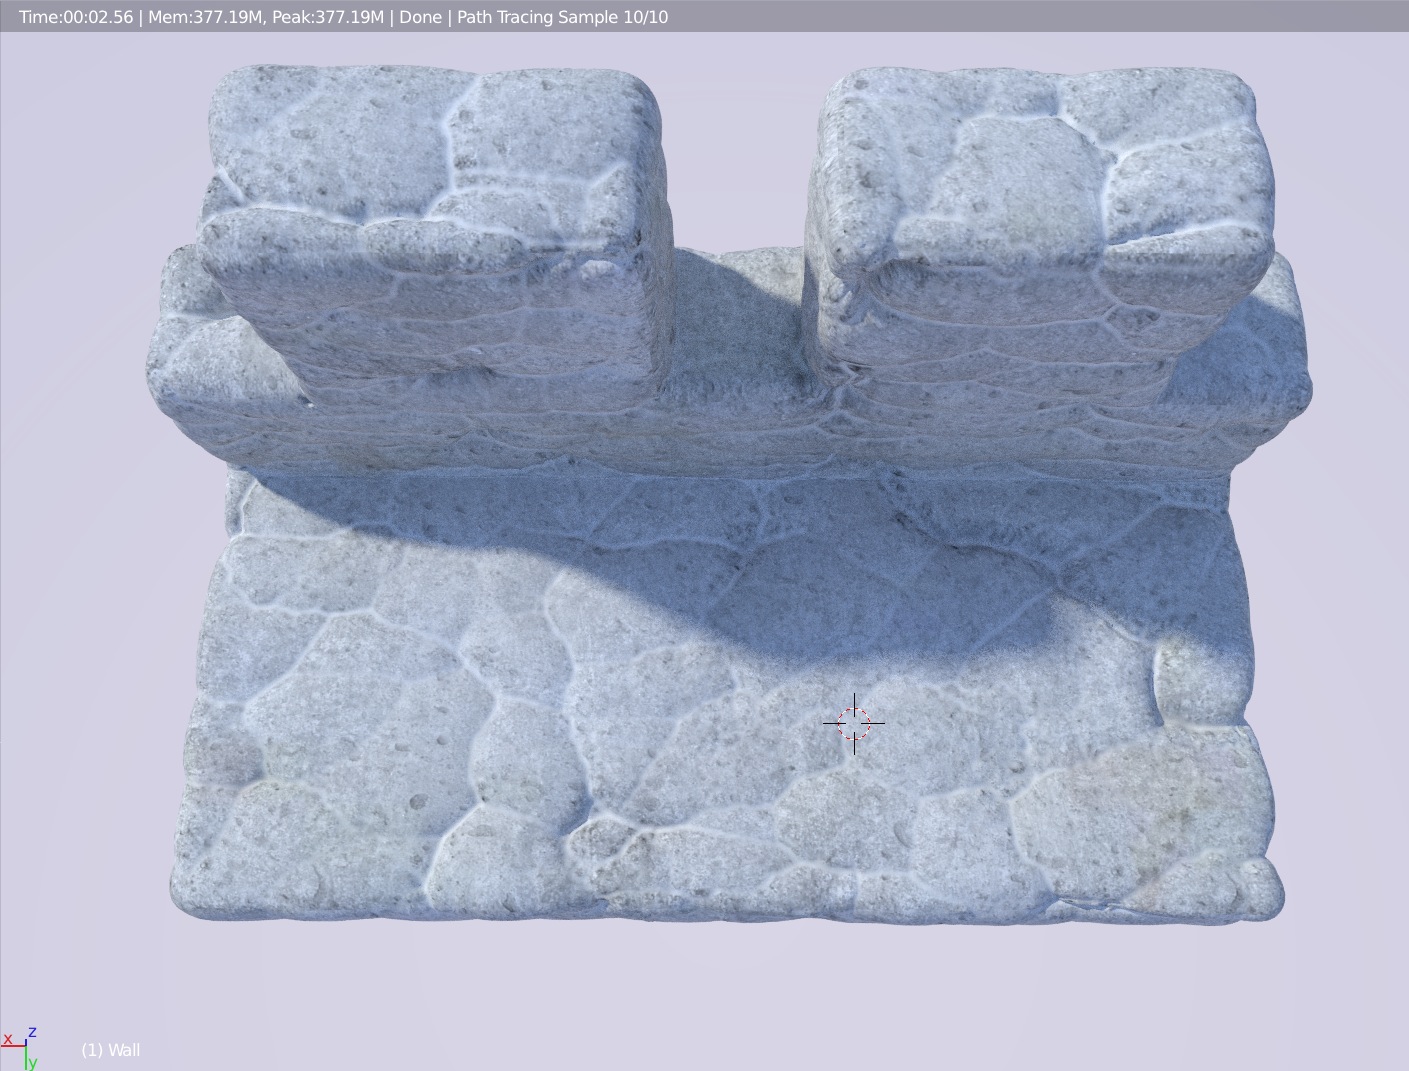
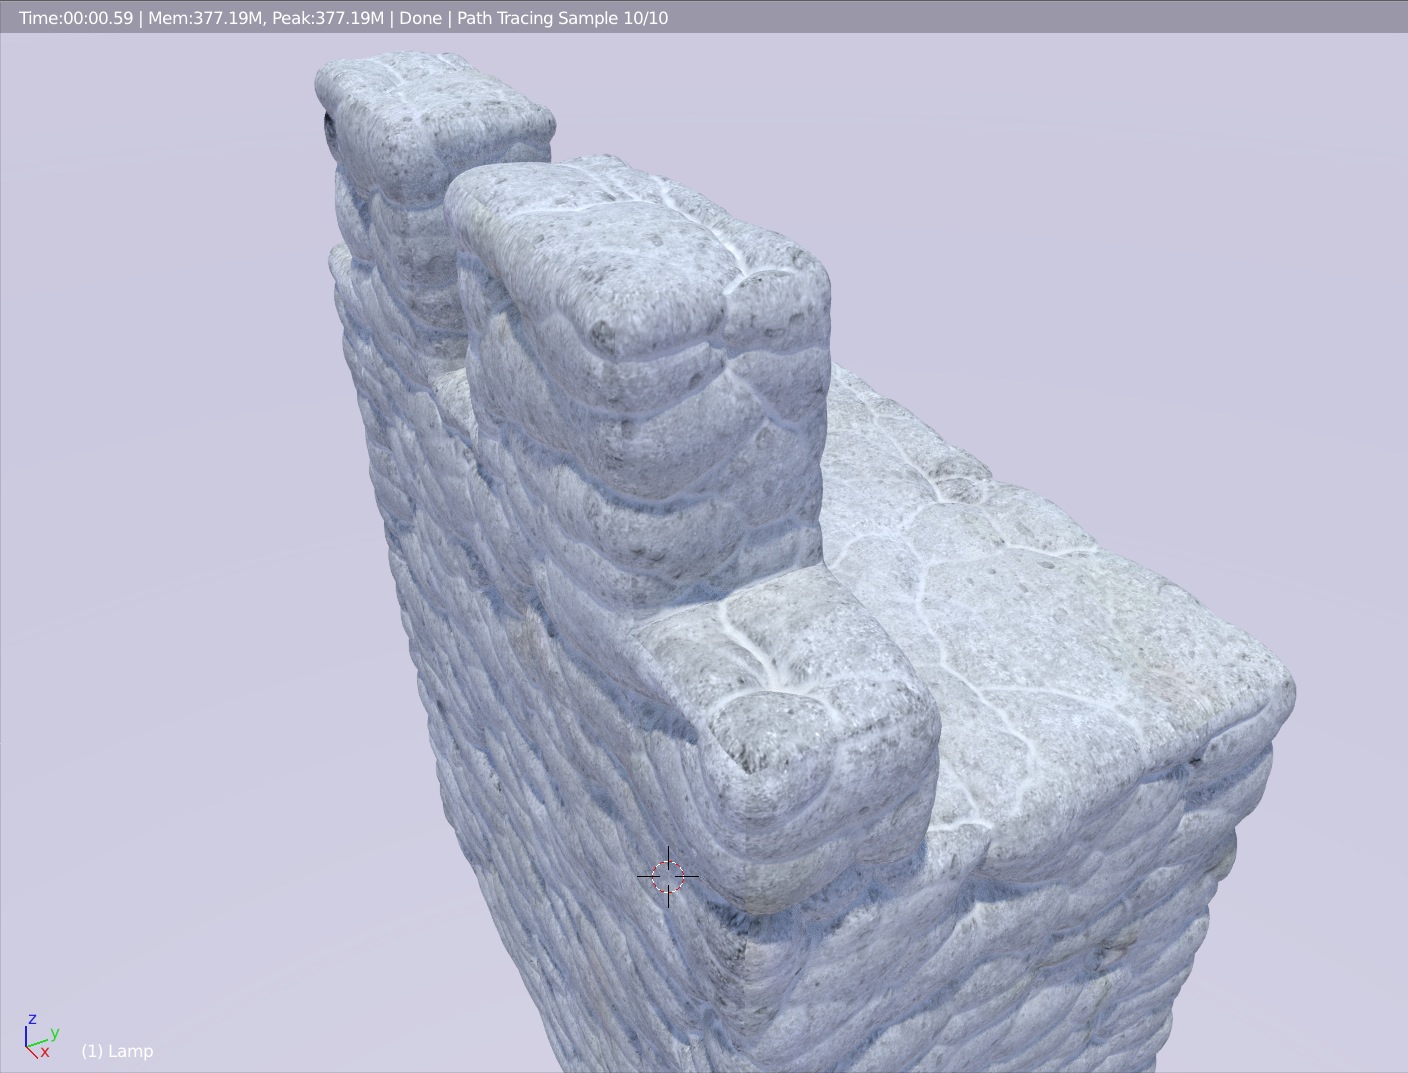
Now this is what it looks like with some experimental shader on a mesh with a displacement modifier.

texture wall 8

texture wall 7

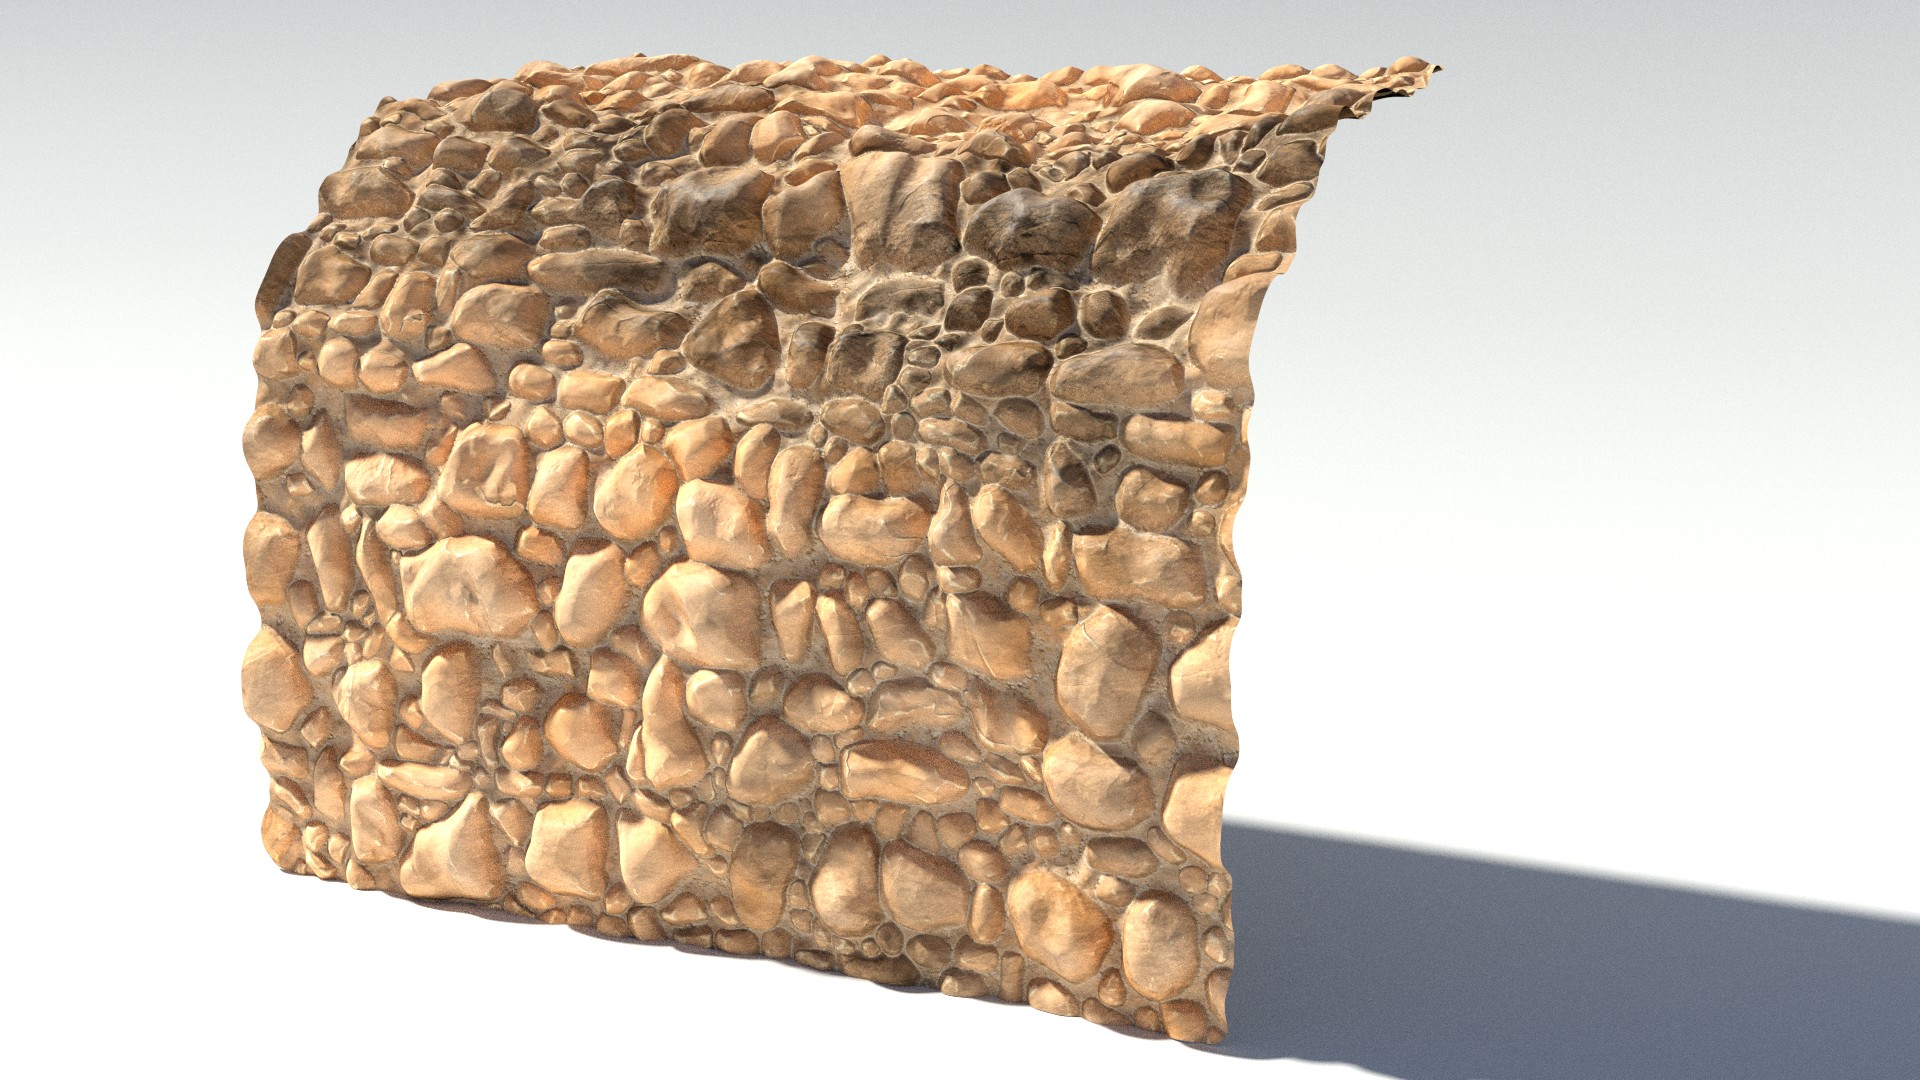
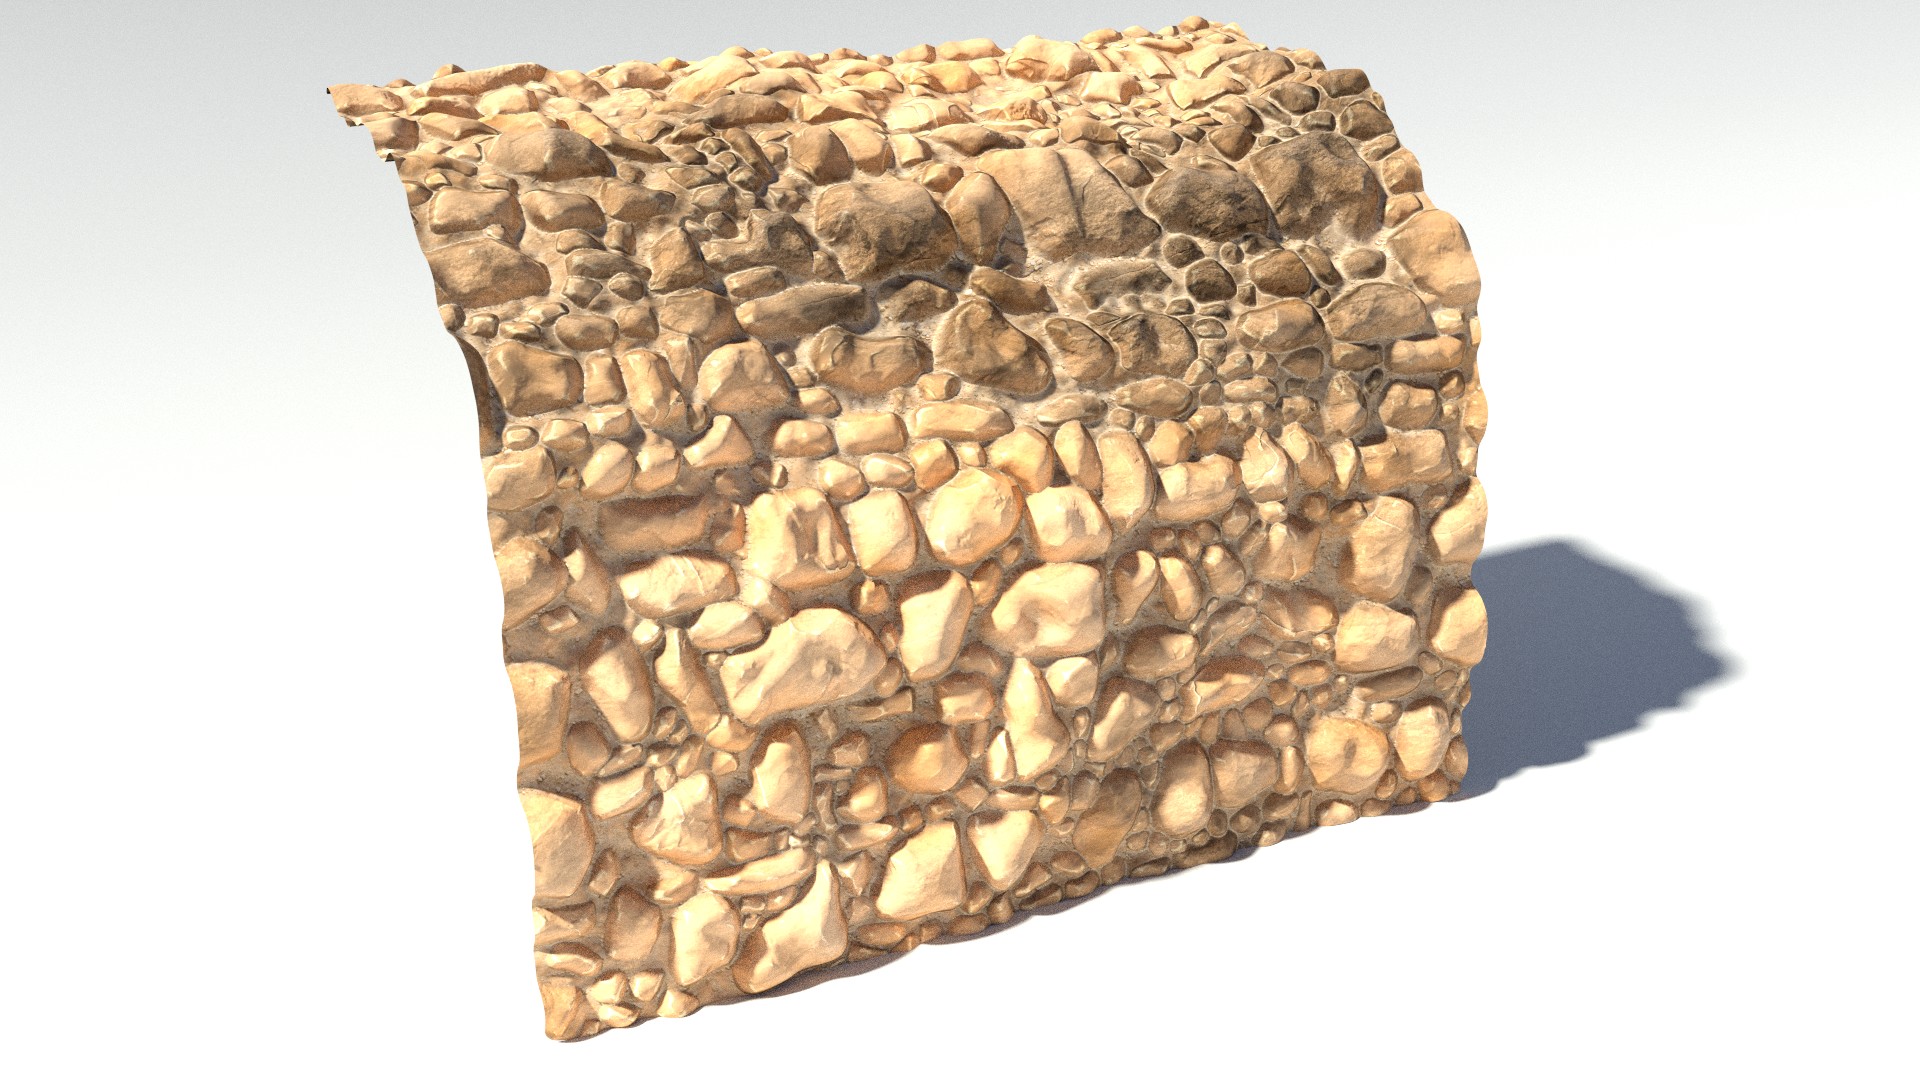
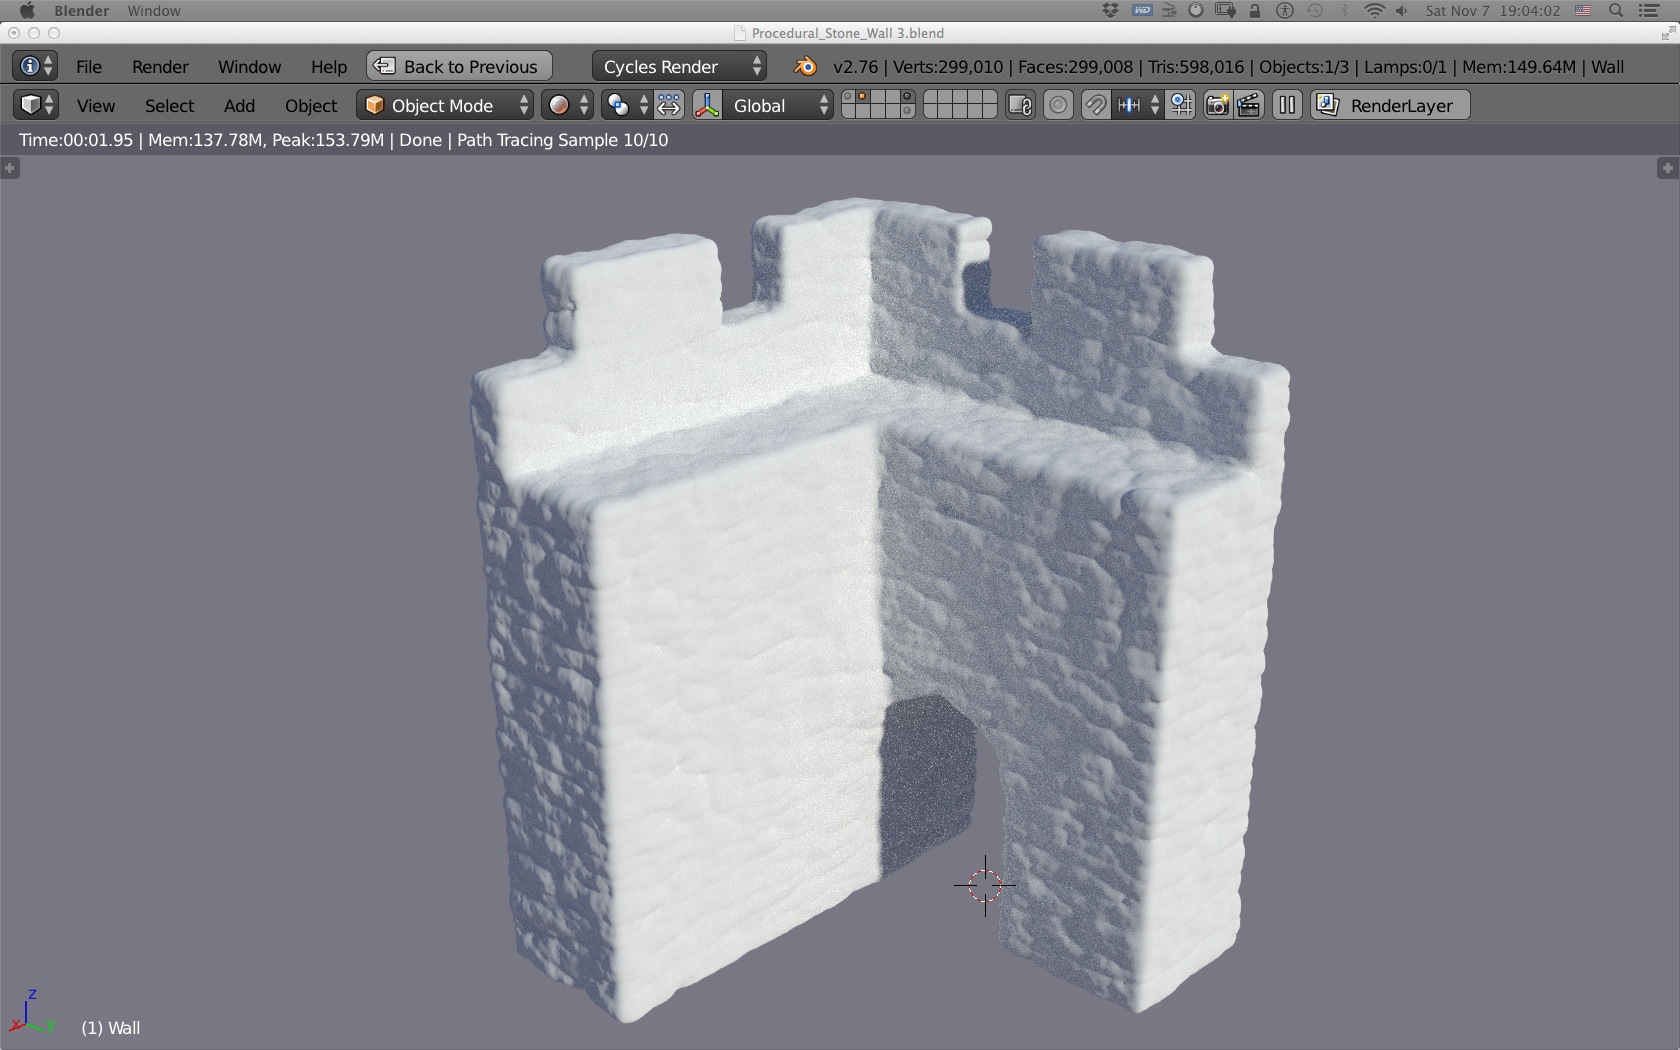
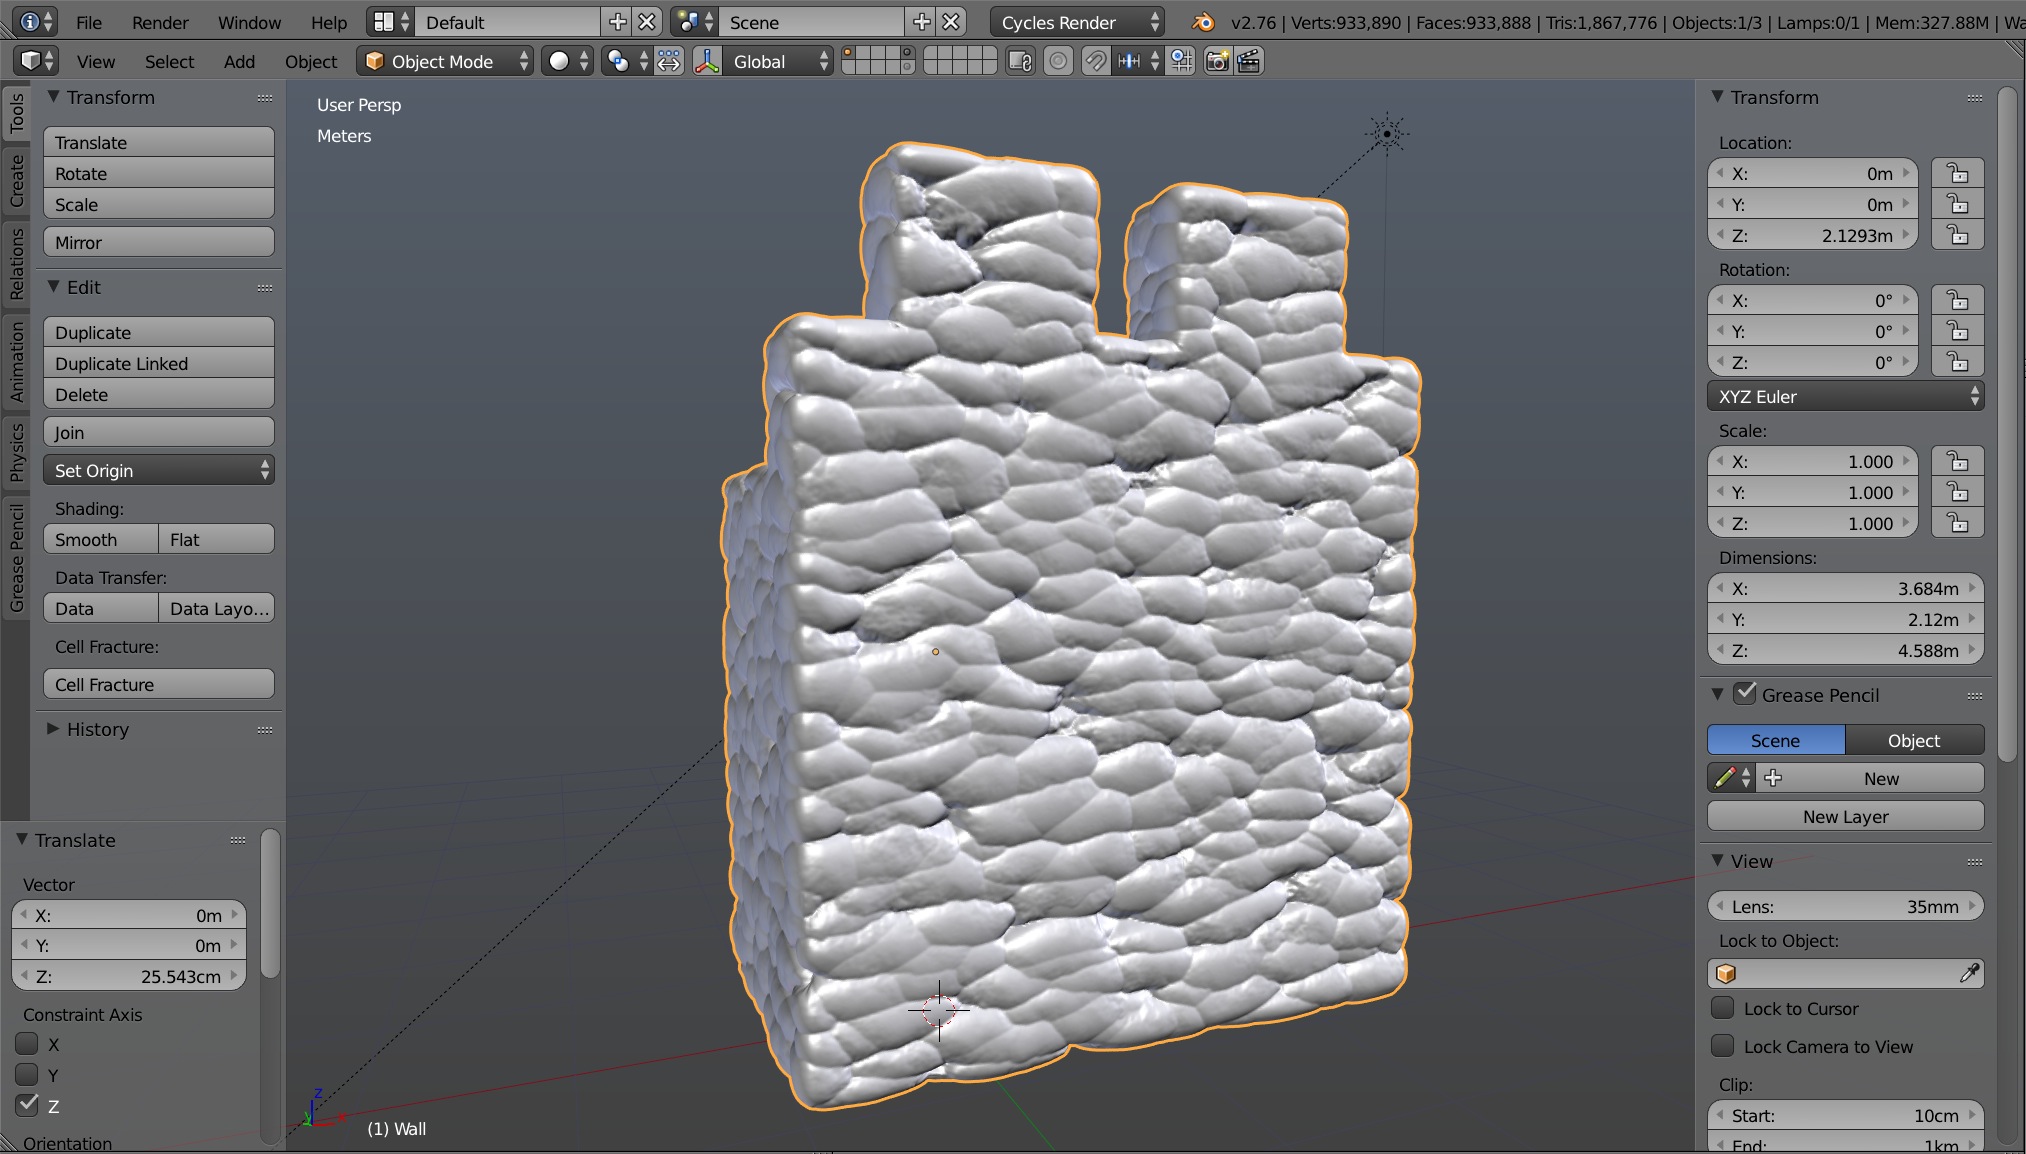
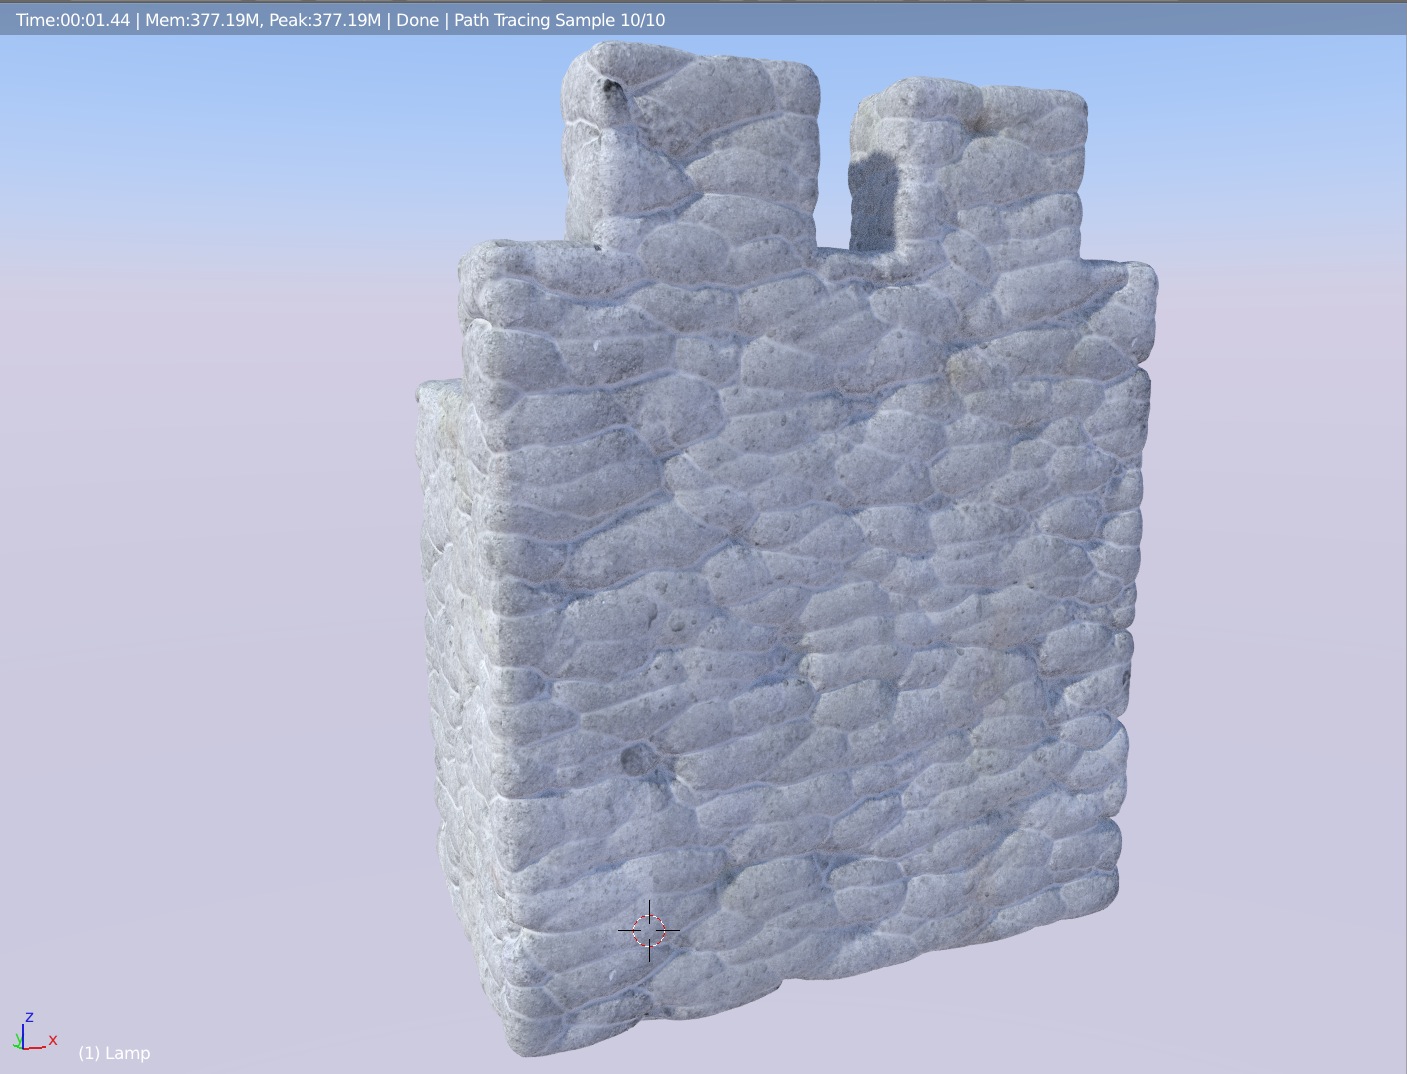
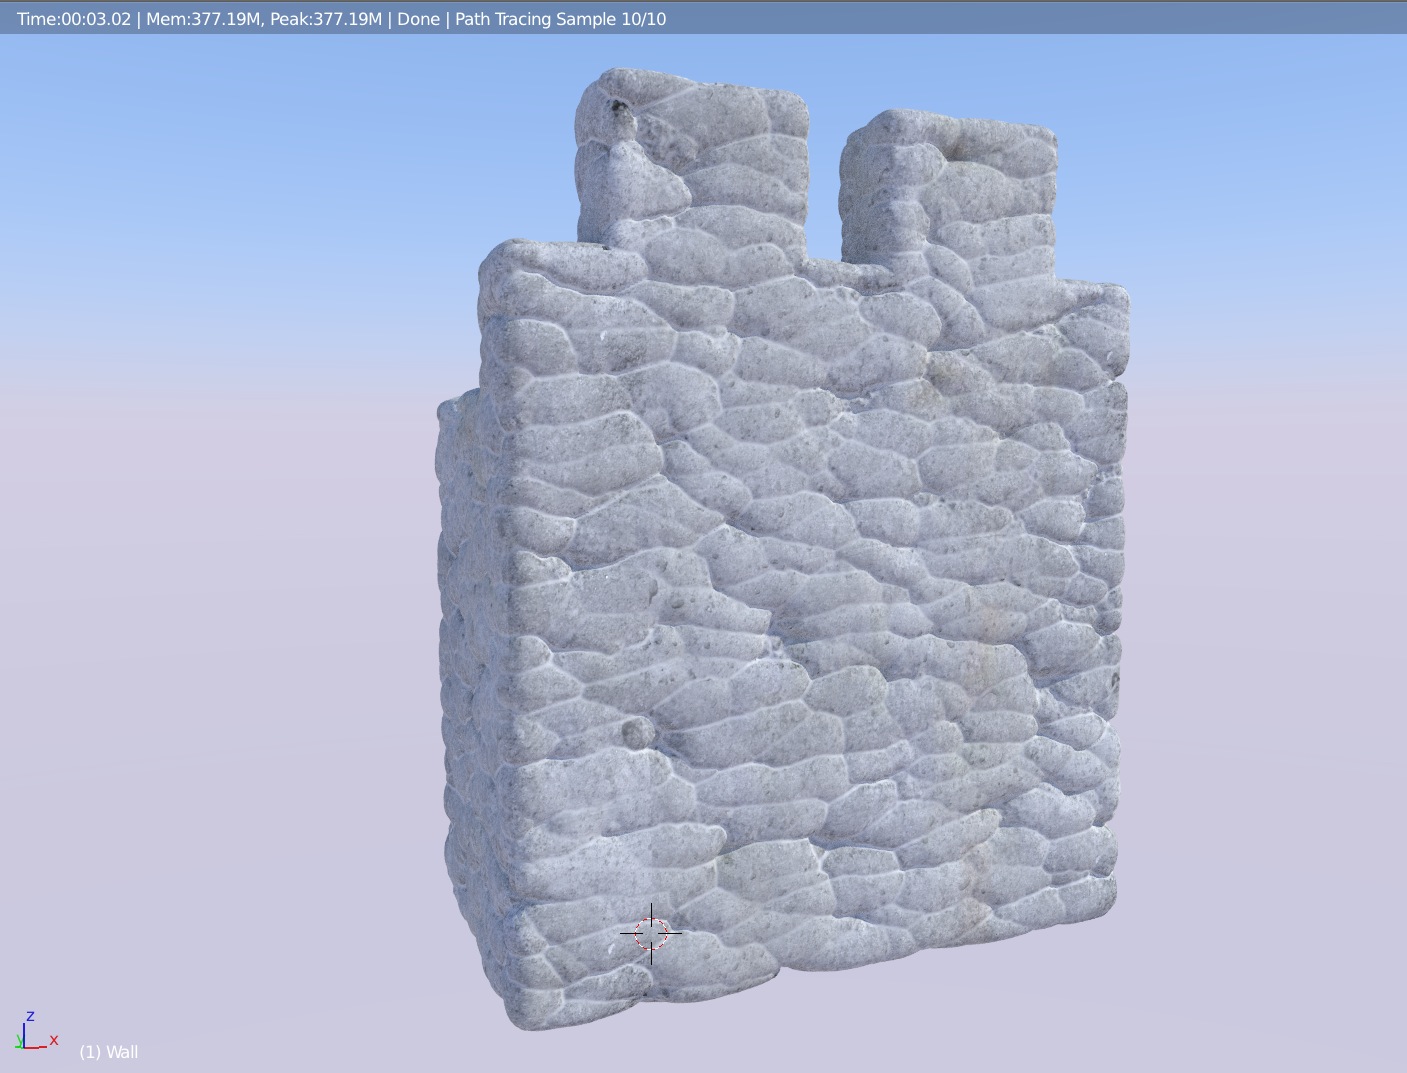
Of course, it would be difficult and prohibitively resource intensive to apply mesh displacement on the entire model and this method is exclusively reserved for closeups shots. For far away shots, normal map will usually admirably fit the bill. This is what it looks like (with a slightly different shader) on an early and incomplete model of the Khirbet. It does not yet incorporate the terrain of the site itself but I’m working on it.

Model Preview 36

The work got started some months ago but was interrupted by other works underway that engulfed all my available time. As this diversion is coming to an end, I will resume my work on 3d Qumran momentarily.

Will we manage to produce a viable proposition of a reconstruction of the site? Time will tell.

Procedural journey in Blender II

While thinking about how to break down the shapes of the stones from my previous attempt, the natural thing that came to my mind was, as usual, the noise texture node. So I fiddled quite a bit with it today and here is the result.

I started from scratch and decided to make it simpler than the previous attempt, that is without all the mechanic that makes all the process scale together in relation to each other. I was going for a quick way to test the deformation of the voronoi blobs, and basically, once again as almost always, a noise texture node is your best friend. Applied to the voronoi coordinates input, it works great given the right values, and to add more variance, add more noise with different values that you can layer on top with a mix node.

The model is nothing special but it will demonstrate the tilling capacity of the procedural texture, here exclusively used as a bump map, and its consistency over the entire model.

Screen1

The mesh has no UVs, all is procedural.

Blender Stone Wall 1

The texture is a simple two colour combination with the height map as a factor. I added a third light colour in Screen blending mode on top with the up vector from the bump map as a factor. There is also some subdivision modifier to break the corners in order to better see the propagation of the procedure.

Blender Stone Wall 2

When stretched over the x and y axis, some areas starts getting problematic, but overall, it not too bad.

Blender Stone Wall 3

The last version is the same model but with only a white diffuse colour map and a displacement modifier based on the baked procedural height map applied on five levels of subdivision surface modifier.

Blender Stone Wall 4

And here is the model with subdiv, matcap and AO in the viewport. Under, the baked height map on a generic Smart UV Project, which is being used by the displacement modifier.

Screen2

Cheers.


Procedural journey in Blender

For quite a long time I have been looking for a way to create some stone wall texture procedurally. I’ve spent hours upon hours trying to get some decent result in Blender, using the node system in Cycles. Alas, all the results I was able to achieve so far were poor, unrealistic, unpleasing and mostly impracticable.

That was until today, when I had that kind of eureka moment where I thought of an alternate approach to the method I’ve used so far in that project. It’s a breakthrough in my endeavour to come up with a usable way to procedurally create some stone wall texture and most importantly : its displacement map.

Unless you paint it, it won’t match perfectly.

The difficulty with stone wall is that any edges, door, window or junction will inevitably produce difficult area for texture matching. Hence, the coherence of the structure is very much disturbed when stones don’t seem to fit properly on the corner of a wall or when it doesn’t match with the top or side surfaces. Of course you can always spend a lot of time, and I usually do, to try to unwrap the volume with the best match possible but it is mission impossible unless of course all the textures have been specifically made for that particular mesh. So unless the project you are working on has enough time and resources budgeted, most of the time, creating 100% custom textures all over the place just won’t be always possible.

Here comes the procedural magic.

The beauty of the procedural process is that it is consistent across all the model because it is volumetric (at least in the case of this example) and it is also extensible and none repetitive if you setup your procedure properly. No matter where you cut, punch or joint your mesh, the pattern will always be matching with very few problematic areas. There are of course some limitations but it is mostly fool proof and for the most part far superior to most unwrapping techniques, no matter how sophisticated, in my experience at least.

Did I say none repetitive? Yeah baby, that alone is a big seller. Endless variations with mostly endless boundaries. No more seams, simple as that. Moreover, if you setup a procedural texture that is well designed, you can typically use it in many scenario, hence a huge time saving bonus later on.

There is a big drawback though : it can be very processor intensive. So no real time here. At least not in its raw form. But you can always bake your procedural texture and then apply it for some real time application if need be.

Not quite there yet, but much closer than I have ever been.

Ok, I must admit that the results aren’t totally satisfying. The stones look a bit bloby and I am still unable to control the size of the groves between the stones. Yes there is still a lot of work to make this really helpful. However, I can set the average size of the stones on the three axis separately and in general as well as the amount of roughness detail and distortion.

What about the stone wall?

Well, here it is with the procedure applied as a bump map. It’s black and white because my goal was to produce a height map that I could then bake and use with a displacement modifier (since vertex displacement is still experimental).

Nodes

The mesh is a very simple one with very few vertices and just a diffuse white. What appears to be in volume is simply the procedure being feed through a bump node to the displacement of the shader output.

Now, this is the same mesh with tons of subdivision and the baked procedure map in a displacement modifier.

Wall1

The same mesh in the live viewport preview with a simple material : a couple of colour map mixed with the cavity map factor. Nothing fancy, just to preview the effect of the displacement modifier.

Wall2

As you can see, there is no seams at the corner and most importably, the stones have a coherent continuation at the corners and on the top.

Wall3

Wall4

The stone are larger on the x and y axis than on the z axis. This produces a quite pleasing effect on the top of the structure where usually stones are larger to cover more space.

Wall5

The seam visible here is simply that of the colour map I slapped carelessly on the model, not of the stones themselves.

Hopefully, I will find some time to continue develop this and maybe make it better so one day, I won’t have to spend hours sculpting every freaking stones to produce a decent normal map or height map.

Cheers.