Taking a break from Qumran
I went back to the model of the mansio of Khirbet es-Samra for which Jean-Baptiste Humbert, archeologist, asked me to make a model. The current model, well under way, uses a wall texture of which none of us are really satisfied. The obvious problem is that the structures on site do not have any significant wall left. It’s mostly razed to the fondations and therefore do not provide any significant way of evaluating the kind of wall that once stood there. But a good starting point is to look at the much more substantial remains at the nearby Khirbet es-Samra, which are believed to incorporate the raw materials removed from the mansio.
One stone at a time
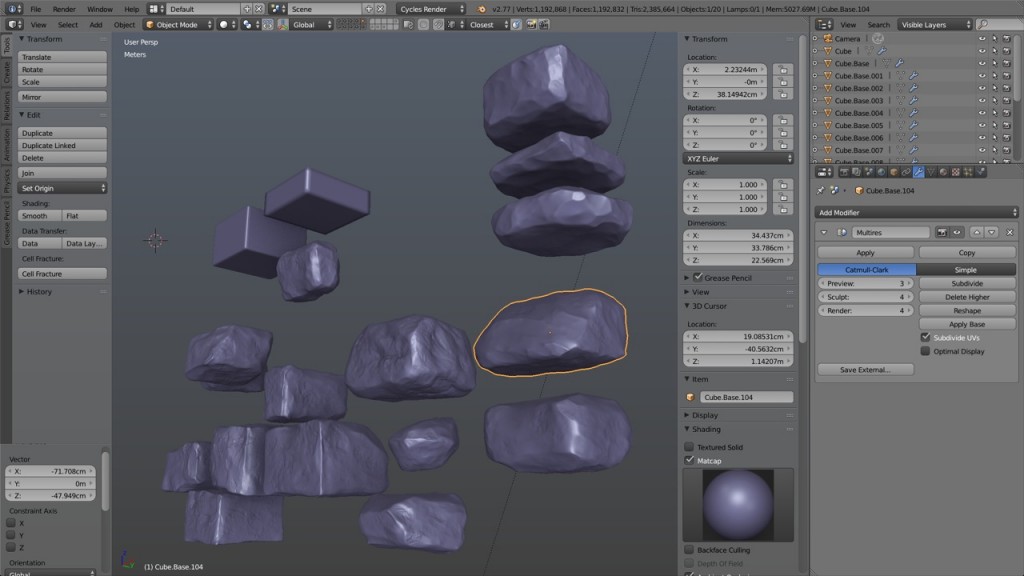
Based on the pictures of the Khribet, I started to model and sculpt some stones with the same technique I used for the stone wall texture of Qumran. It is a very time consuming process but to speed up the work, I decided not to only sculpt the front and side faces, leaving the back side untouched, but rather to sculpt the stones entirely. Thus, each stone can then be rotated on its six faces to create six variantes, and since I do not have to conform strictly to any given pattern, I can then use all these variantes to rebuild a similar wall structure as seen on the reference pictures.
Building the wall
After having sculpted about fifteen stones of varying shape and size in conformity, more or less, to the reference pictures, it was time to duplicate each one five times and rotate them so that each duplicate shows a different face to the camera. I then had 90 stones ready to be placed.
Then started the process of building the wall from the ground up, literally. As I was aiming at reproducing the natural placement of the stones in the wall, I started from the bottom aligning a row, then moved to the row above it and so on, trying to fill the gaps with smaller stones as a builder might do in real life. I must admit that my experience at building stone walls is minimal but nevertheless, my little real life experiment on the mountains of Switzerland wasn’t in vain, at least I like to think of it that way.
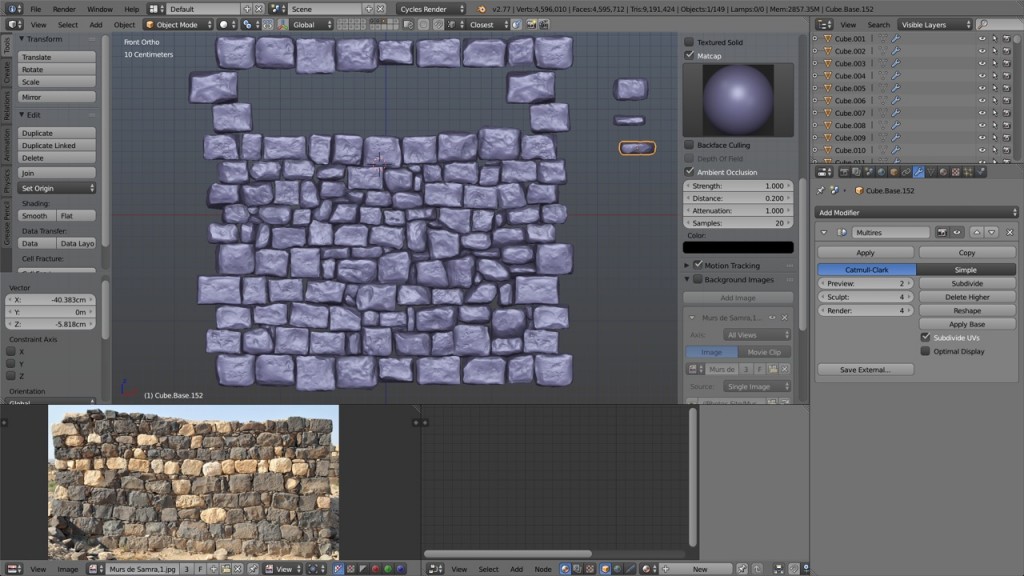 Working with an eye on the reference pictures, I kept on constructing the wall but I choose to add slightly more randomness to the rows because of the only tiny bit of wall remaining on the mansio site where it seemed to be the case.
With the help of a simple plane, I levelled the front faces of the stones to give the structure an even aspect.
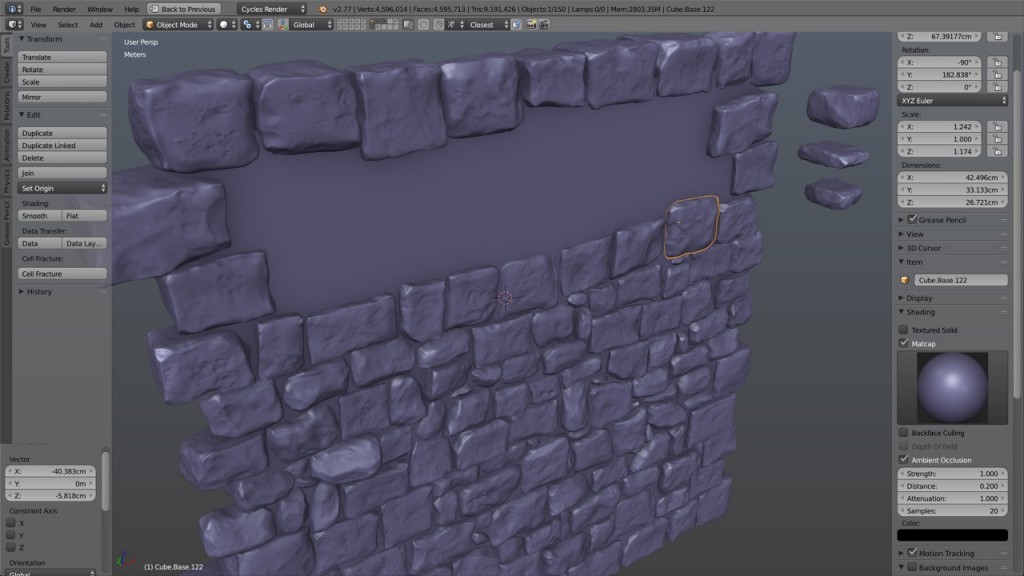 As I was missing a few stones to complete the wall, I went back to the sculpting process and a few stones later, here I was with my finished wall. Of course it is build to tile seamlessly. The back of the wall is completely unequal but who cares.
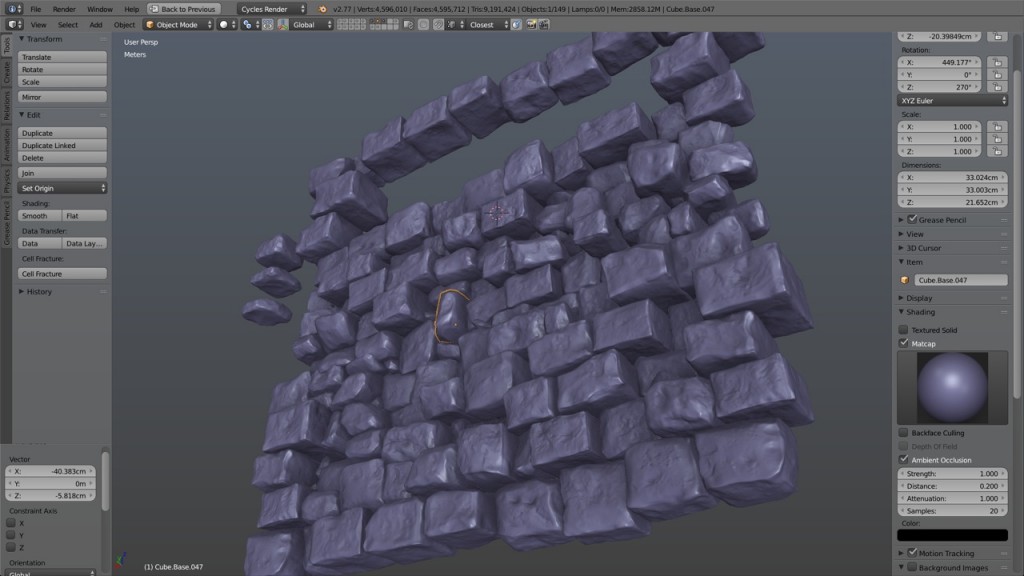 At this point, every stone was a separate object. This allowed me to place and make adjustments to the stones very quickly. However, because these were sculpts, the vertex count was quickly becoming very high. One way to avoid total meltdown of the computer is to keep the Multires modifiers and set the preview level to half or lower the resolution of the sculpt.
I already had a background plane for the seams between the stones, so I imported it and adjusted it to the proper size. Beware that this background has to be seamless too as some parts of its joining borders may be visible on the final texture.
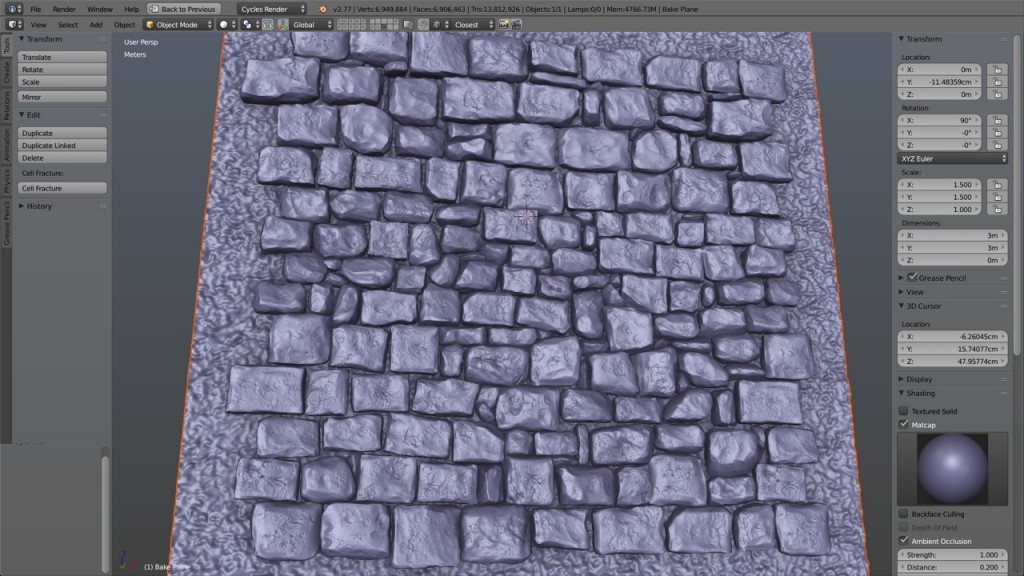 A limitation of Blender (the 3d software I use) is that it handles very poorly great number of separate object during the baking process. I found that I needed to join all the stones into one big object for any bake to complete successfully.
At this point, having applied all the multires modifiers with their maximum level of details, the polycount was just staggering, well at least for a 3 by 3 meters wall, reaching past the 19 millions vertices. Everything was slowing down as the computer struggled keeping track of all those vertices. Time to remove some dead weight. I deleted all the vertices behind the background plane and came back just under 7 millions vertices.
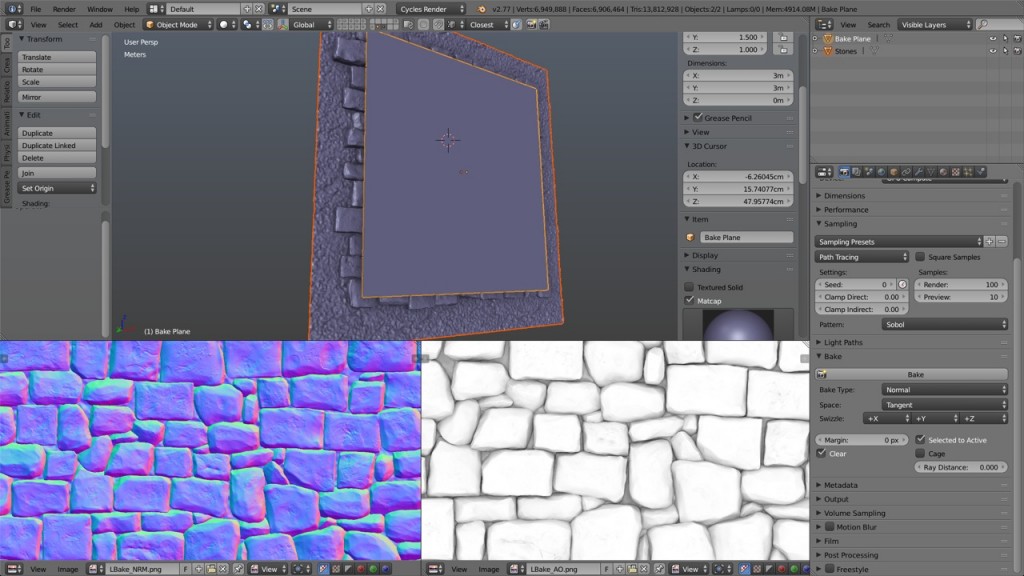 Its was then time to bake the normal pass followed by the ambiant occlusion pass. Too bad Cycles doesn’t yet support the height map pass, and I am too lazy to go back to Blender internal engine for that. It’s ok, I can load the normals into CrazyBump to get a decent height map.
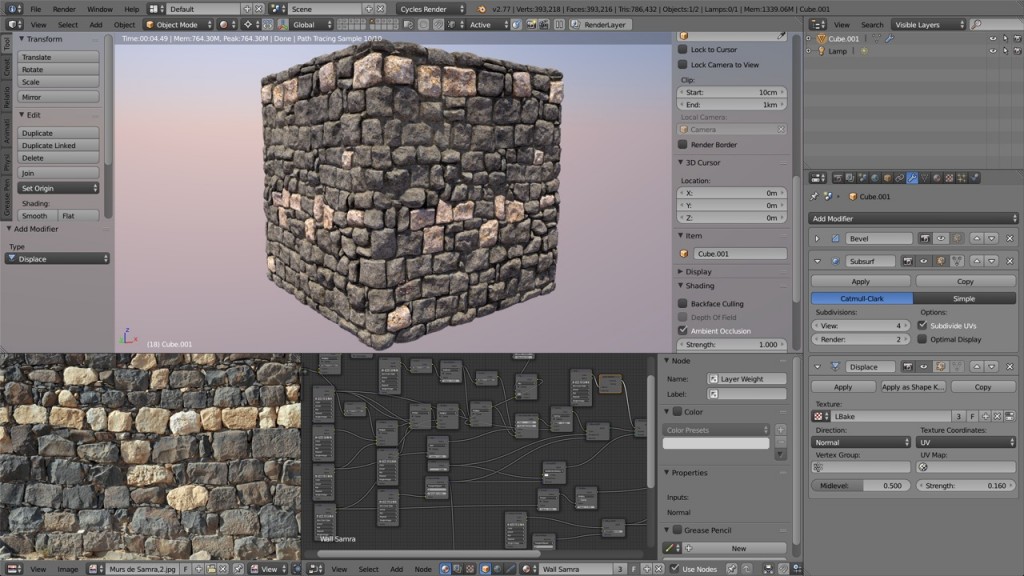 Having done all my bakes, it was time for a little material node cooking to test my new wall on a regular cube, here with some subdivisions and a displacement modifier and at the bottom left: the reference picture taken at Khirbet es-Samra.
The albedo (color map) was made with a freshly shot set of pictures of some similar basalt stones from a different archeological site. The color variations were all done with material nodes.
What I have learned
If you don’t need to conform to a very specific stone profile, it’s quicker to model a complete stone and then use all of its six faces rather than sculpt five faces (front and sides) and not be able to use it for more than its front face.
If you make duplicates of a single object to use different portion of it (like the six faces of the stone), don’t wait until you have completed the whole project to decide to trim what you don’t need (like the back part of each duplicate). Make duplicates, rotate them as you need and then go ahead and remove the parts you won’t need before moving on to duplicating the next sculpt or model. Thus, you will always avoid reaching ridicule amount of vertices and your computer will always be more responsive.
It’s best not to sculpt the fine details like any stone decal brush or the like, because once sculpted in, you can hardly remove it and thus the sculpt is sealed. On the contrary, if you only sculpt the overall shape of the stone omitting the very fine details, you can always reuse the sculpt for different type of stone applying different finer details with decals or manually right before the bake. Thus creating different models with the same base stone, saving a lot of hard work and time.
Lionel
Dear Sir,
great your Qumran 3D-Model. My name is Alexander Schick and I am a follower of Prof. Hunzinger, who worked in the team of De Vaux in the 50’ies.
I see you are working with Prof, Humbert. Wondeful send him my warmest greetings please!
Would love to use your model in my Qumranexhibition.
If you interested I would be happy to get contact with you.
Best Alexander Schick
http://www.bibelausstellung.de
http://www.sakrileg-betrug.de
mail Schick.Sylt@gmx.de
Hi, I will send your regards to Prof. Humbert. I’ll get back to you soon.
Regards.